Description
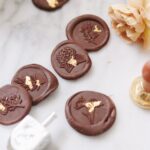
These little chocolate wax seals are so fun and satisfying to make! I suggest reading through all the instructions before starting the process just to make sure you have all the correct tools and materials on hand—but if you do, you should be good to go. Have fun with it and make them your own!
Ingredients
Units
Scale
- 1/2 cup semisweet chocolate chips
- Parchment paper or a silicone baking mat
- A stone pastry board or metal platter (or other work surface that is small enough to be placed into a freezer and thoroughly chilled)
- Parchment paper
- A small bowl filled with crushed ice
- A dish towel or a few paper towels
- Edible gold foil sheets
- Hobby/craft tweezers (for lifting and placing the gold foil)
- Metal wax seal stamps (plural!) with designs of your choice; you’ll need to have more than one on hand because you’ll only be able to make a few stamps at a time before needing to put the stamp away to chill again
Instructions
- Place the pastry board and wax seal stamps into the freezer for at least 30 minutes to chill.
- Melt the chocolate chips in a double boiler or in the microwave (microwave in 20-second increments to avoid over-melting and burning the chocolate or making it chalky). Let the chocolate sit in the bowl for at least 2 minutes before using, just so it’s not suuuuper hot.
- Remove the pastry board from the freezer; line with parchment paper or the silicone baking mat. Next, spoon the melted chocolate into a piping bag (or sandwich bag with a small corner snipped off) and pipe small dollops onto the parchment, or just use a small spoon to place it directly onto the parchment/baking mat. Either works; it really just depends on how much precision you want.
- Add flecks of edible gold leaf to each dollop of melted chocolate using your hobby tweezers. You can also just use the tips of your fingers, the way I did in the video within this post; it’s technically not recommended because the gold leaf can be difficult to work with and get stuck on your fingers.
- Remove the wax seal stamps, plural, from the freezer—do this at the last possible second to preserve as much coldness as you can! Pressing gently but firmly, place them straight down into the chocolate, all in one motion (i.e. try not to do any wiggling around or circular motions; you want the first thing the stamp touches to be immediately cooled and imprinted, so you don’t want to move around the chocolate too much). At this point, most tutorials suggest waiting 5-20 seconds before removing the stamps—that didn’t work for me, and I ended up waiting between 40 and 60 seconds, on average. Then, I gently coaxed the stamp off of the chocolate by holding the parchment down around it.
- Immediately place the just-used stamps into the waiting bowl of crushed ice, then wait until they’re thoroughly chilled and ice-cold before beginning on a new batch. I read that you can sometimes stamp 3-4 seals before needing to put the chill the freezer again; that didn’t work for me. I had much better results when I just used multiple seals to get through a batch quickly, and then waited several minutes for them to chill again. The designs just don’t seem to make their way into the chocolate without the help of really cold stamps. (This is also why I suggest starting with a small batch of melted chocolate, only 1/2 cup! You can add more as you go, if necessary.)
- Once the stamps are completely chilled, repeat the process to whip up a new batch of seals! Tip for removing the stamps from the bowl of ice: Use a paper towel or dish towel to wipe off any condensed water droplets/any form of moisture before placing it into the chocolate; these will register as parts of the seal design and get emblazoned into the chocolate as well.
- Refrigerate or freeze the now-finished chocolate wax seals until ready to use. Because they may get melty, I recommend using them individually, rather than lumping them together into a pile or throwing them into a gift box (for instance, use them as cupcake toppers or as part of an edible place setting!).
