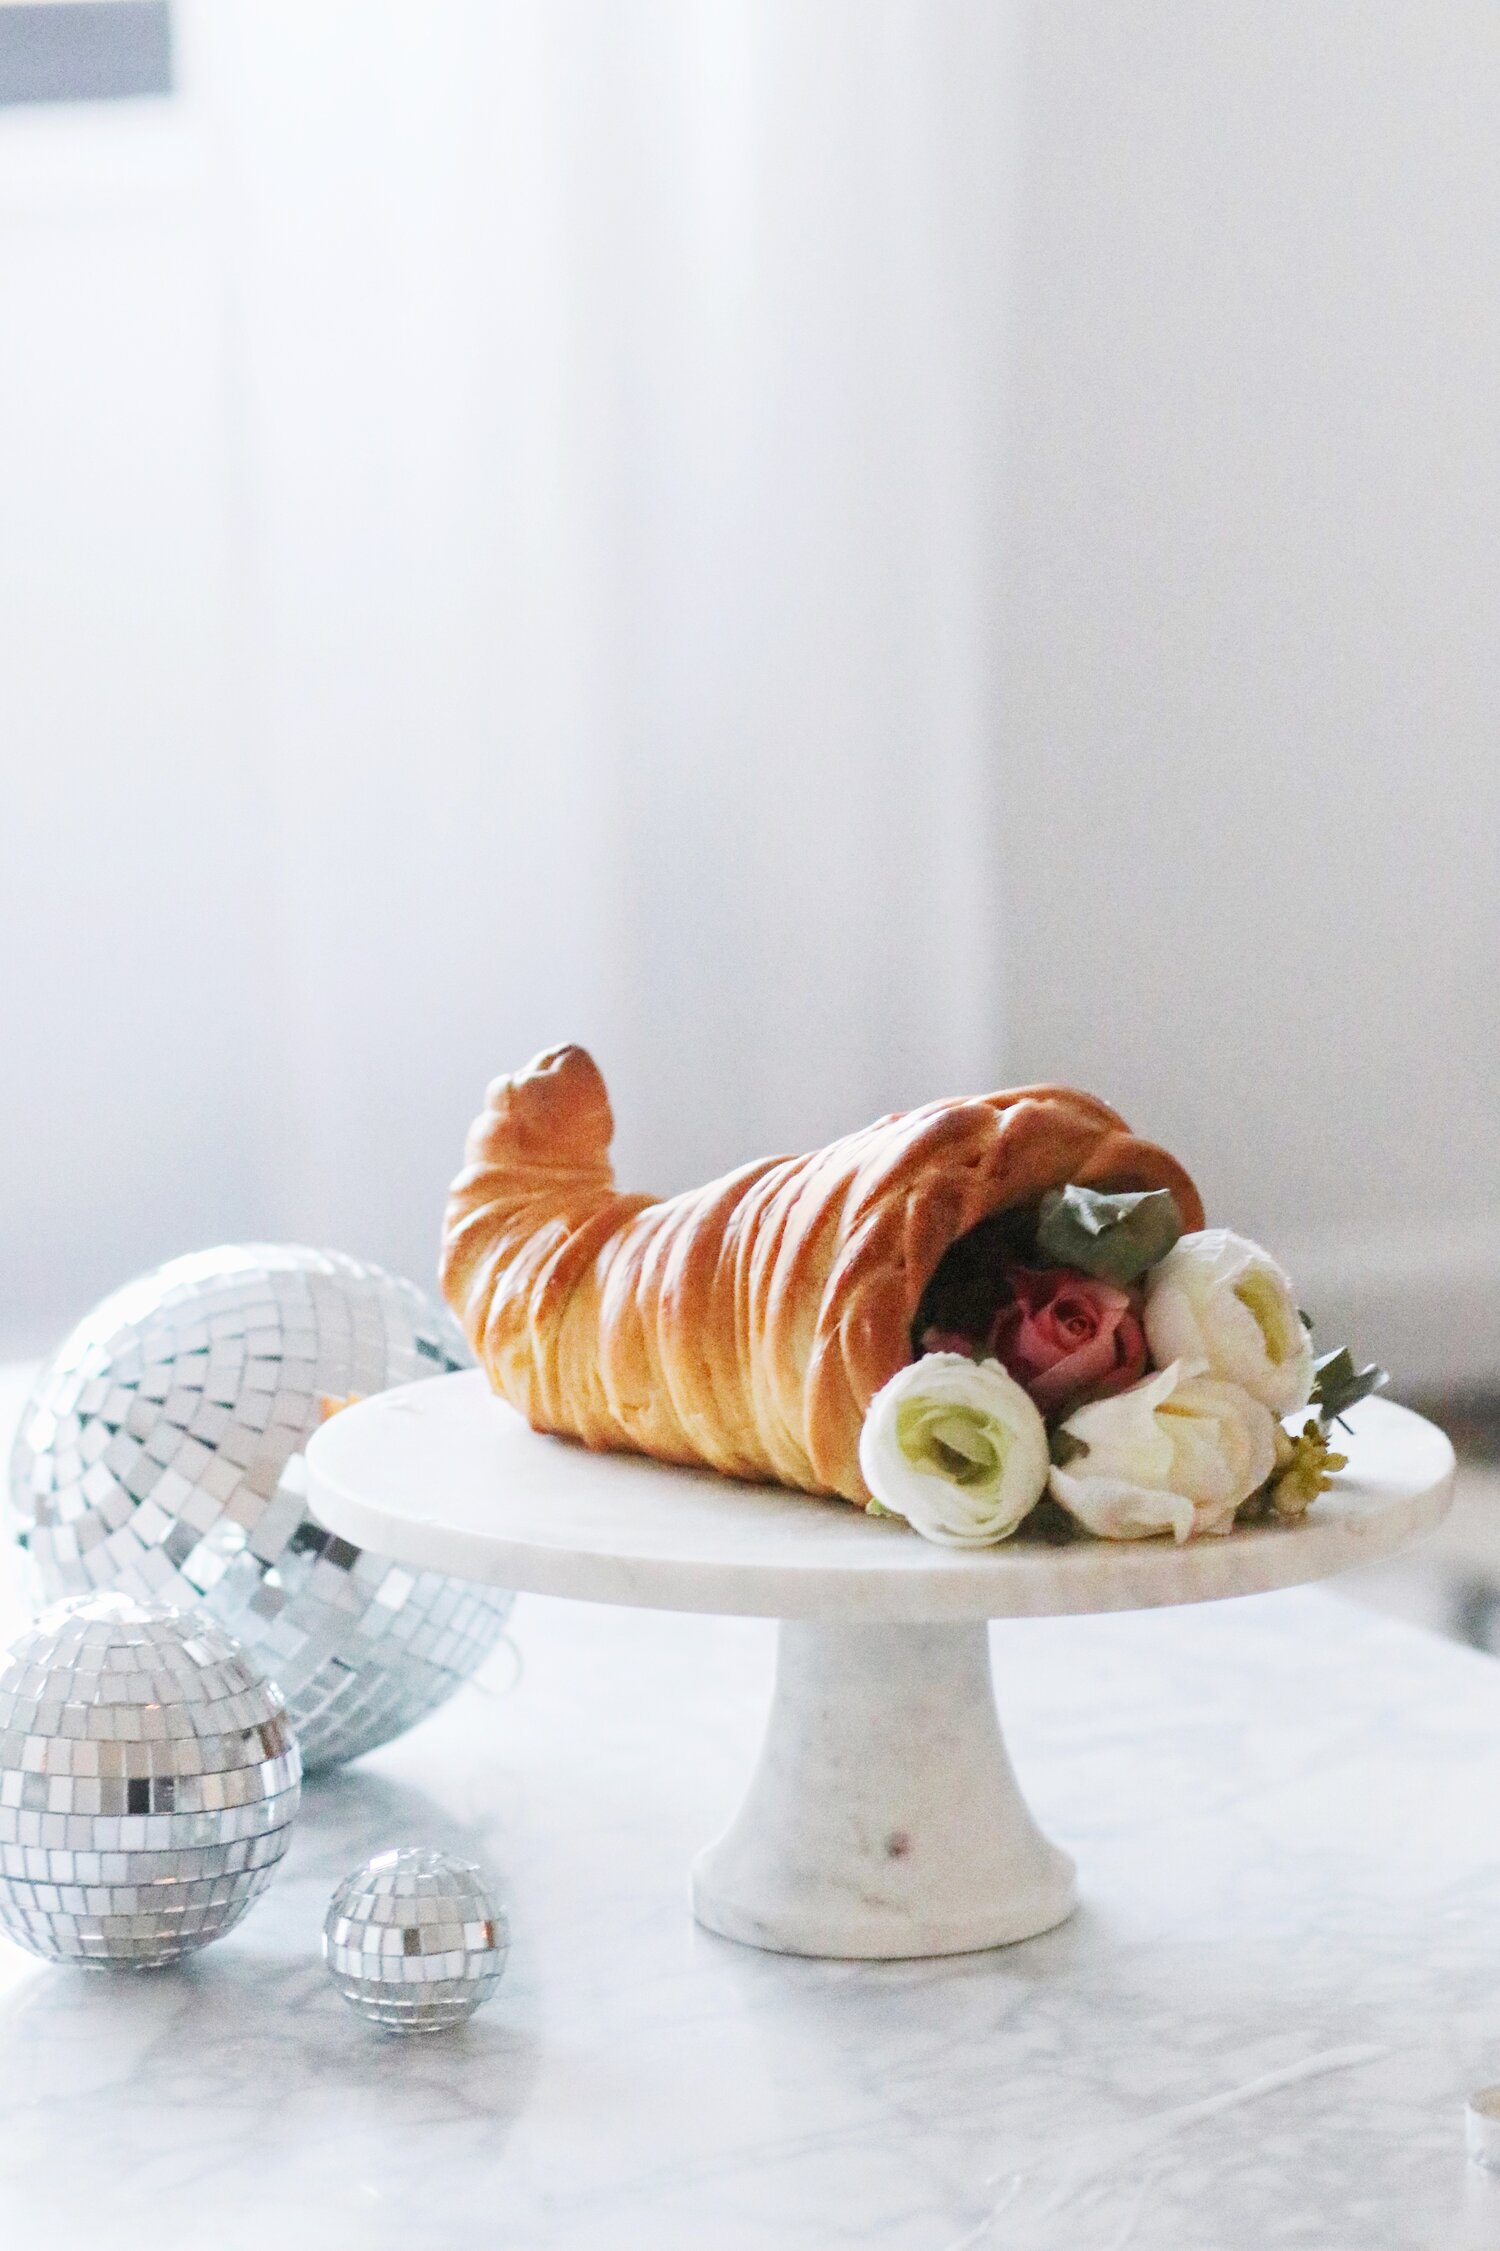
Well, here it is. At long last. The CHALLAH CORNUCOPIA!!!!!!
Or perhaps…”The Challah of Plenty.”
Or perhaps…”Challucopia”?
Nope, never mind. Should’ve stopped while I was ahead.
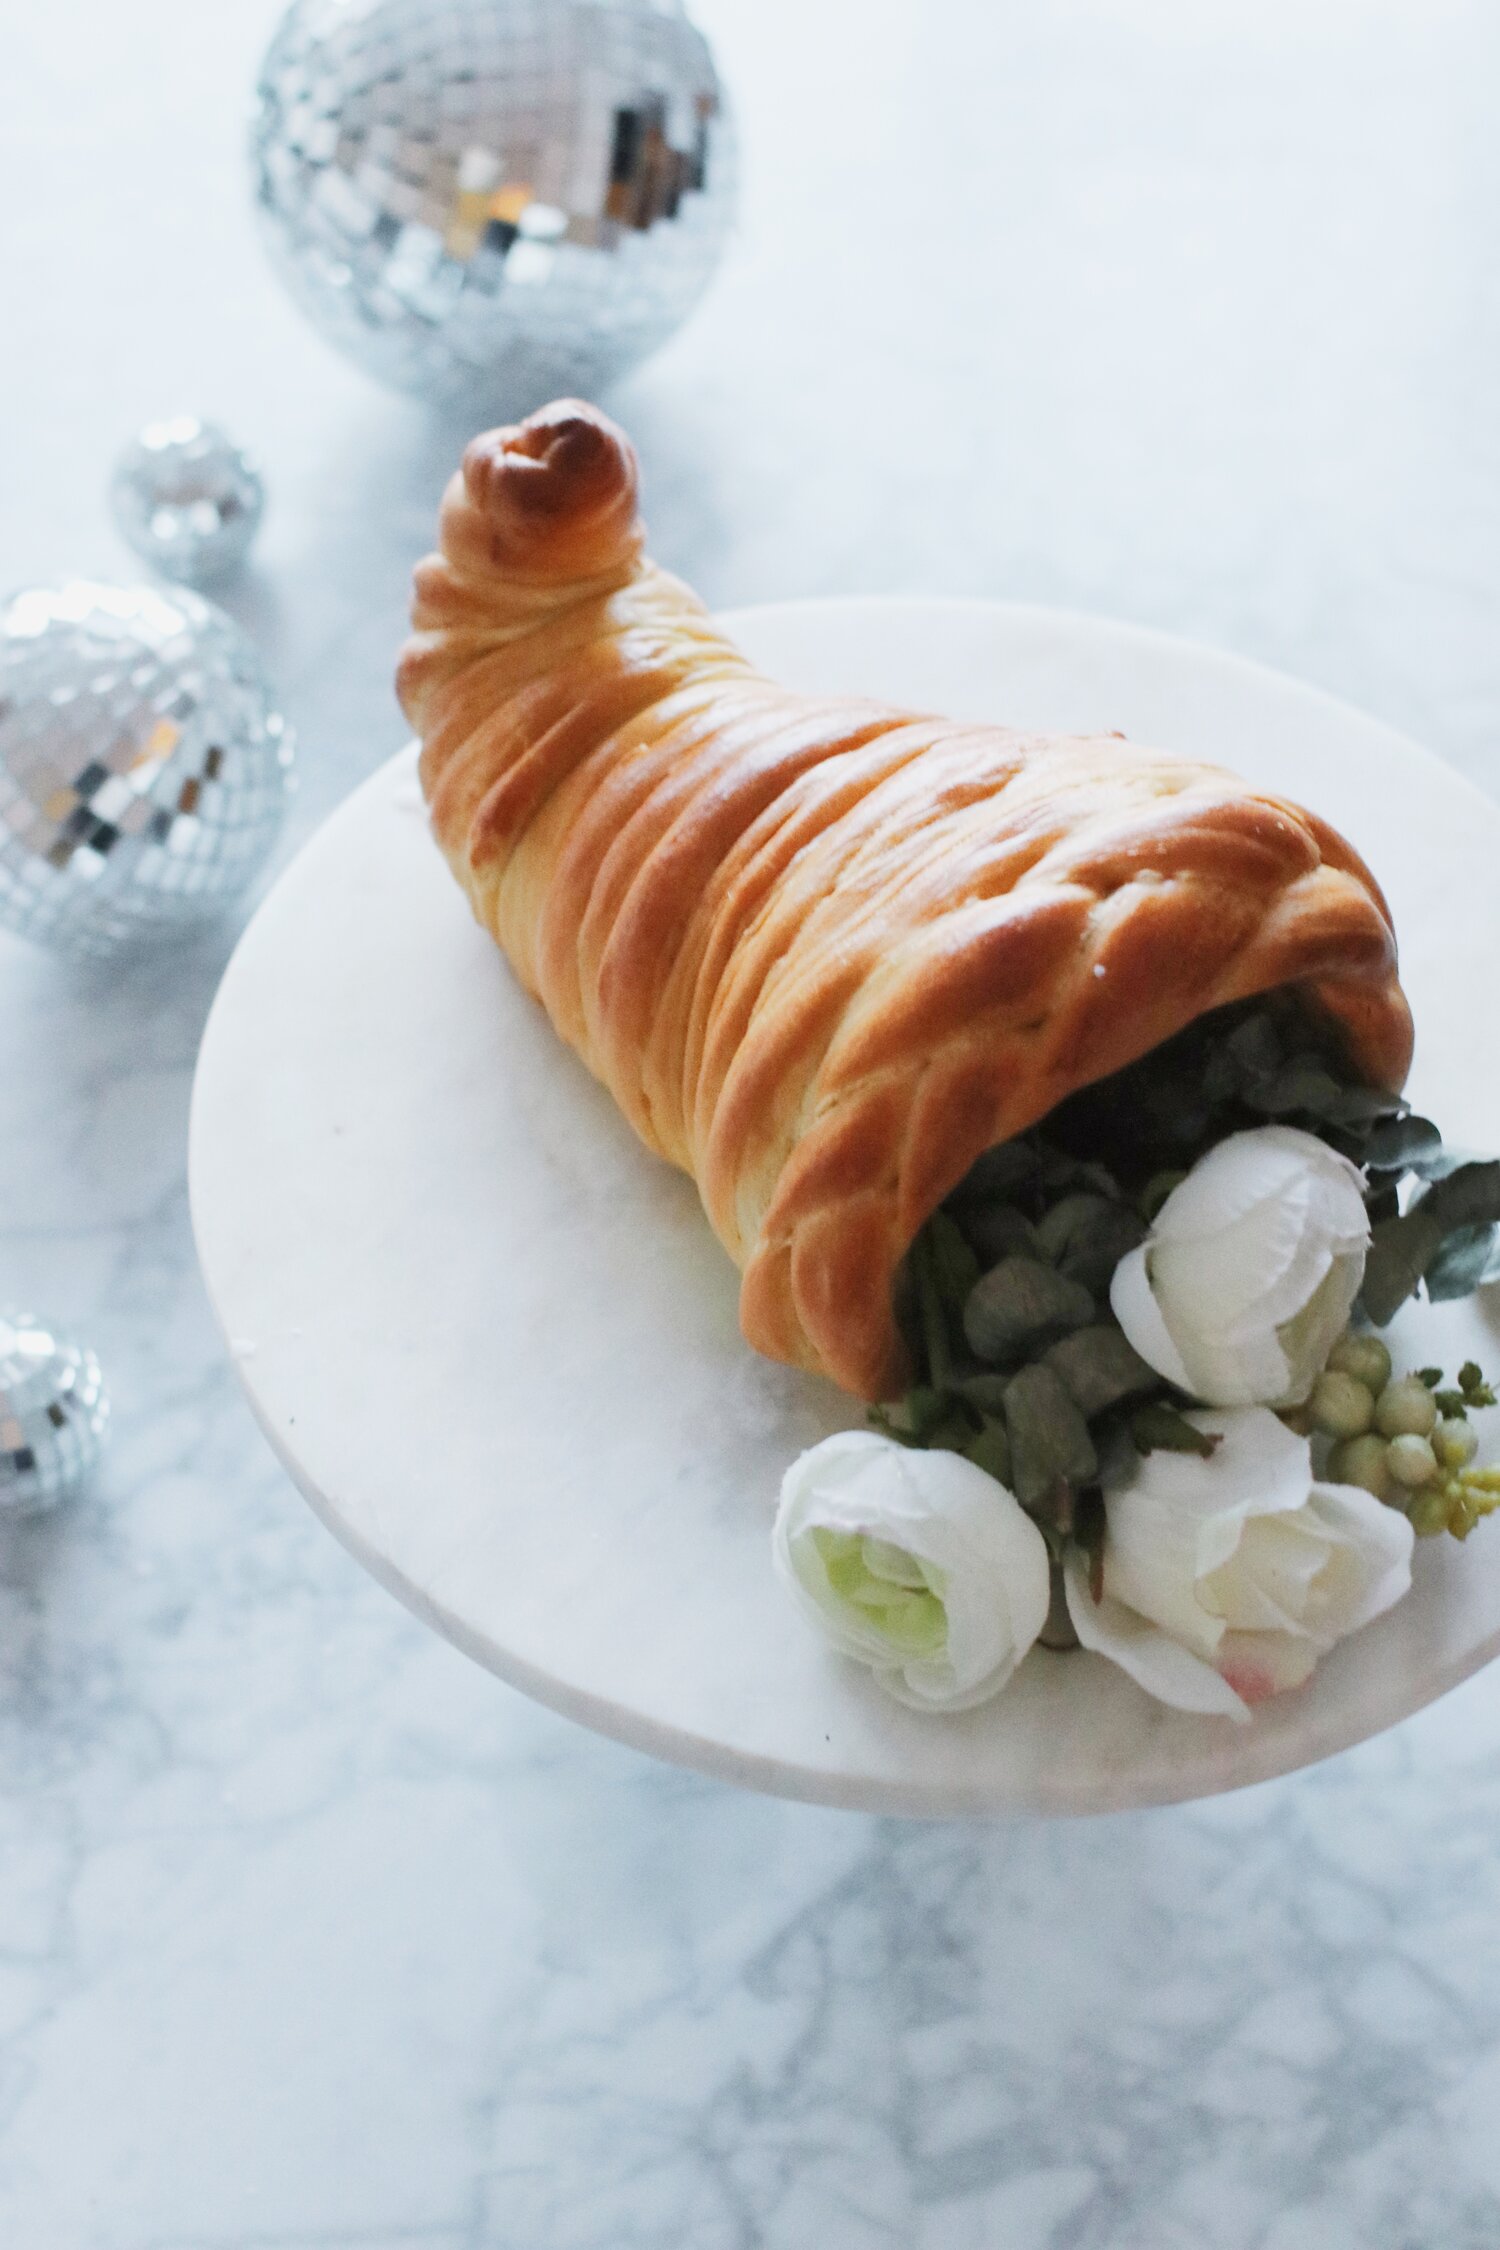
The point is, it’s here. Yay!!! And it’s surprisingly simpler than it looks.
(Did I say it’s “simple”? No. No, I did not. I said it’s “simpler than it looks.” So nobody yell at me later for misleading advertising. I mean, it’s a dang CHALLAH CORNUCOPIA, for goodness’ sake.)
Yes, this glorious, challah-ified cornucopia will take you a little bit of time, but it’ll also give you the world’s coolest Thanksgiving (or Friendsgiving Shabbat?) centerpiece. Also, nothing beats the heart-puffing-up feeling of pulling this bad guy out of the oven and realizing that YOU. ACTUALLY. DID. IT.
Your heart. It will puff. And so will the challah.
Tutorial below. Don’t be alarmed by the length; I really just wanted to be there for you with tips and tricks to make each step LESS intimidating…so actually, all that text should make things easier, not harder. Oh, and be sure to tag me on IG if you end up making this so I can see your creations!
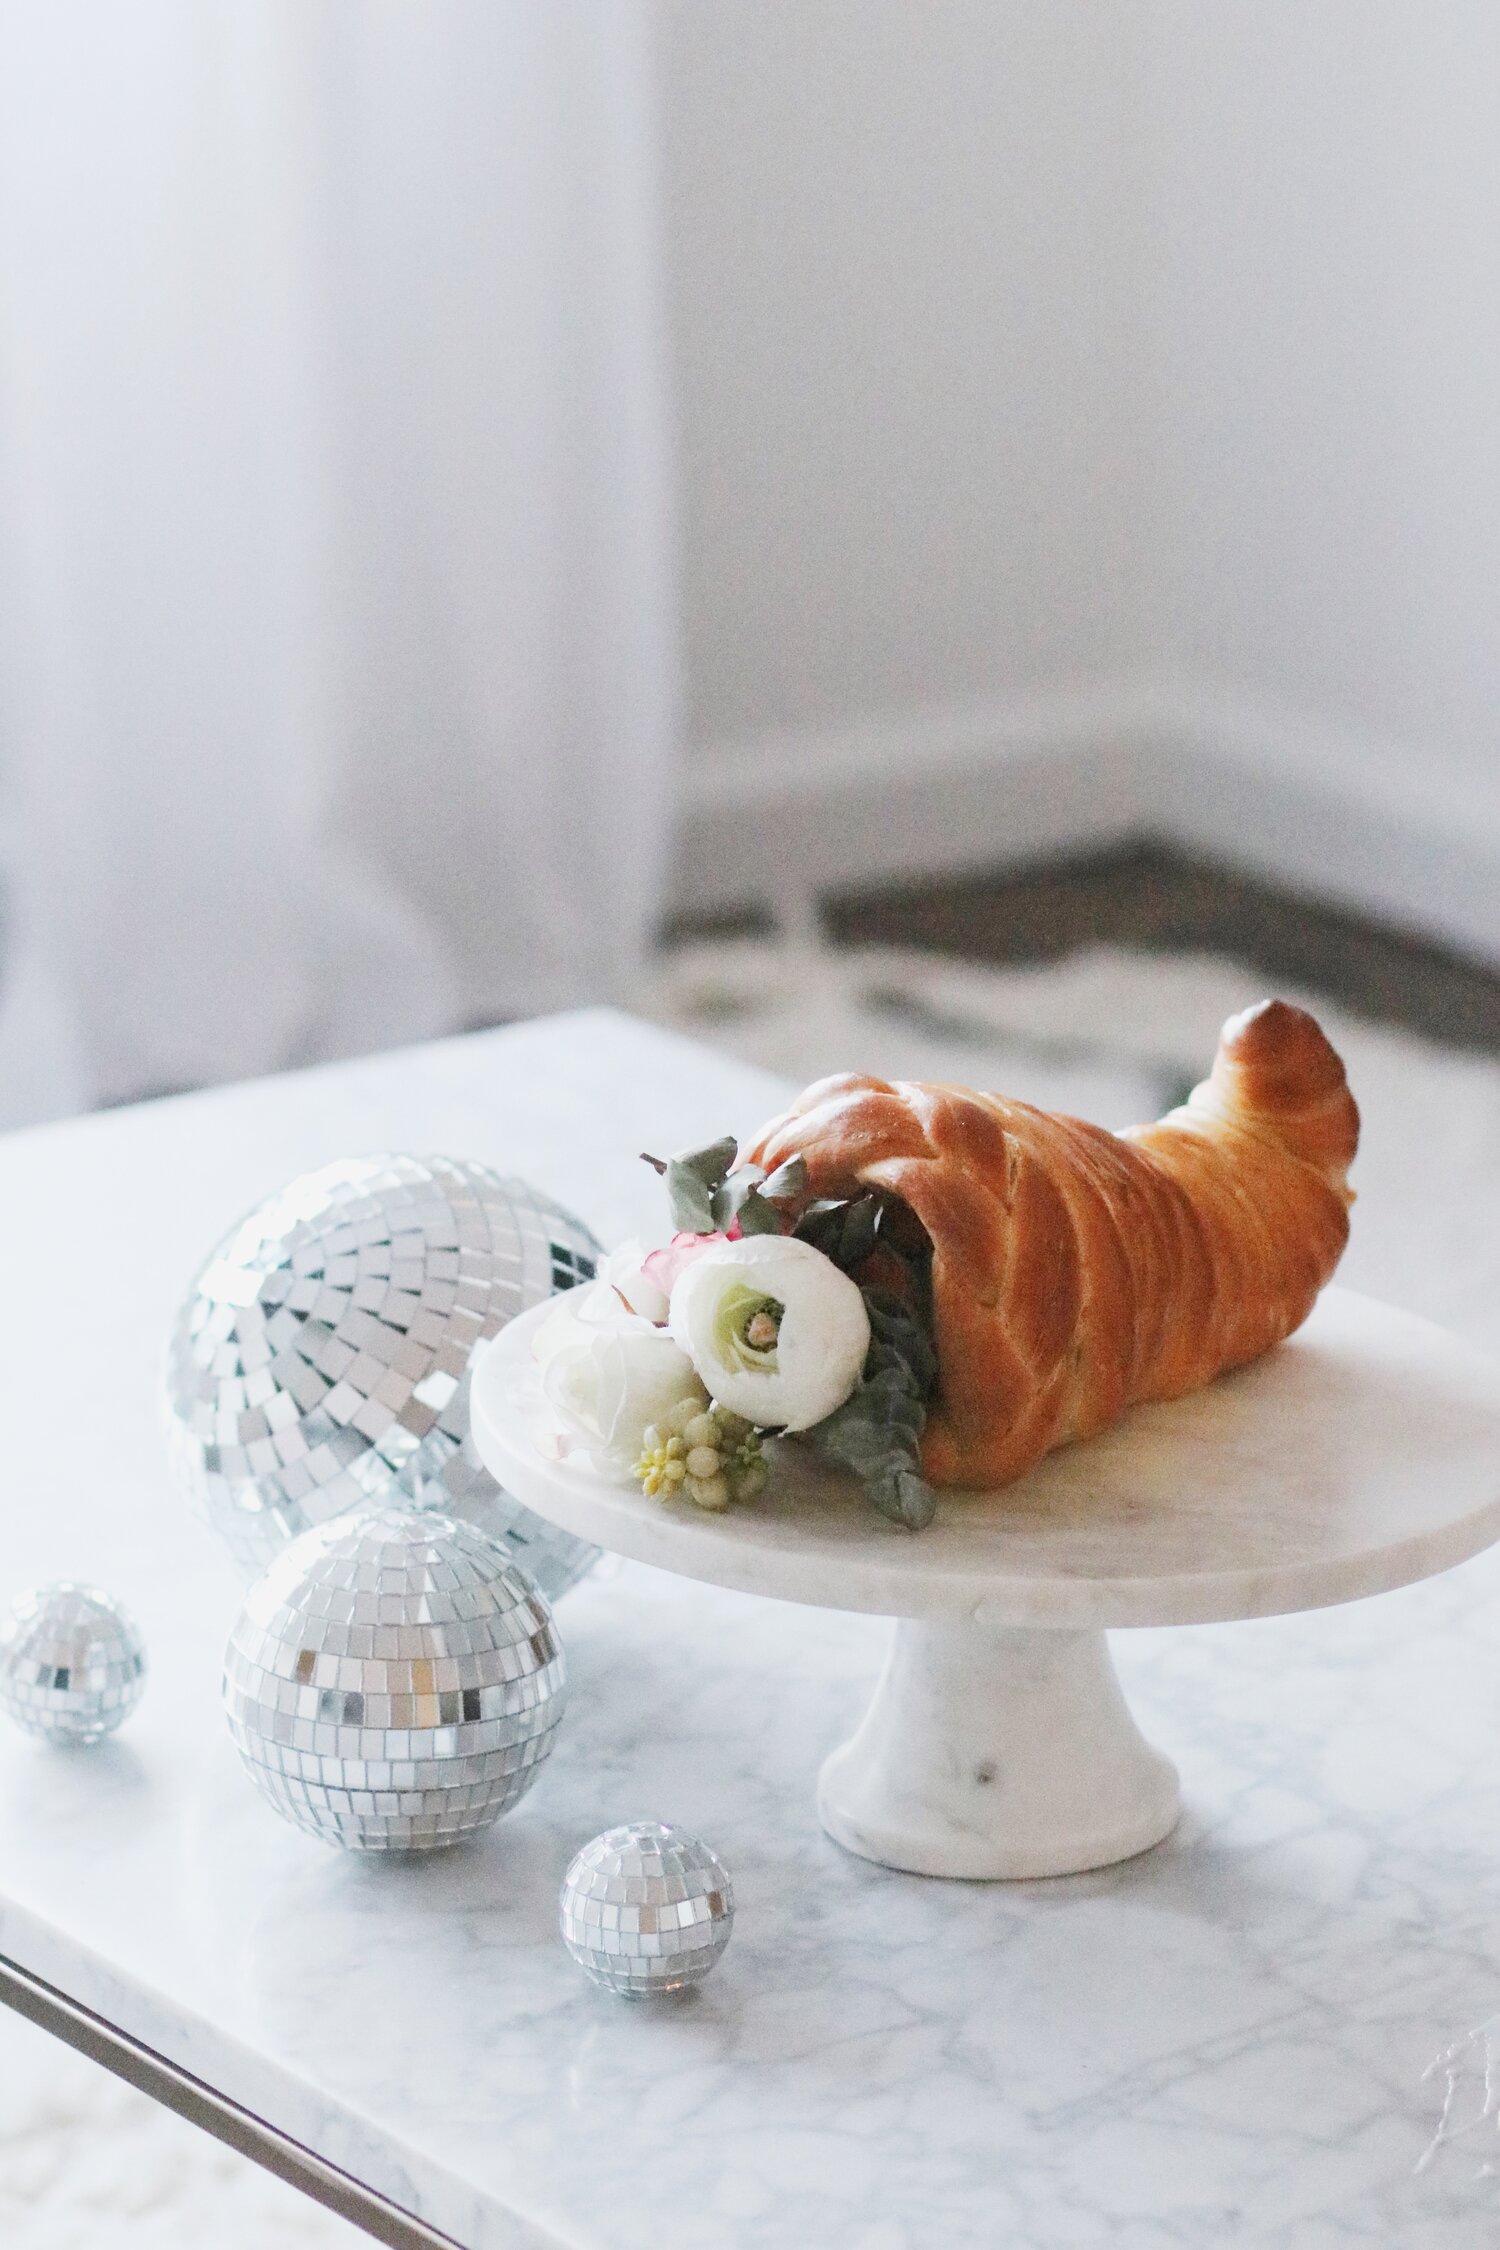
Challah Cornucopia
Makes two medium-sized “cornucopias.”
What You’ll Need:
For the cornucopia forms:
- 1 roll heavy-duty aluminum foil
- 1 roll parchment paper
- Nonstick cooking spray
For the dough:
- 3 cups unbleached all-purpose flour
- 1.5 cups unbleached bread flour
- 1 cup warm water
- 1 package (2 1/4 teaspoons) dry active yeast
- 1 tablespoon kosher salt
- 2 large eggs, room temperature (tip: you can warm them up quickly by letting them sit in a glass of warm or tepid water for a bit!)
- 1/2 cup olive oil
- 1/4 cup honey
For the egg wash:
- 1 egg, beaten
- 1 tablespoon water
What You’ll Do:
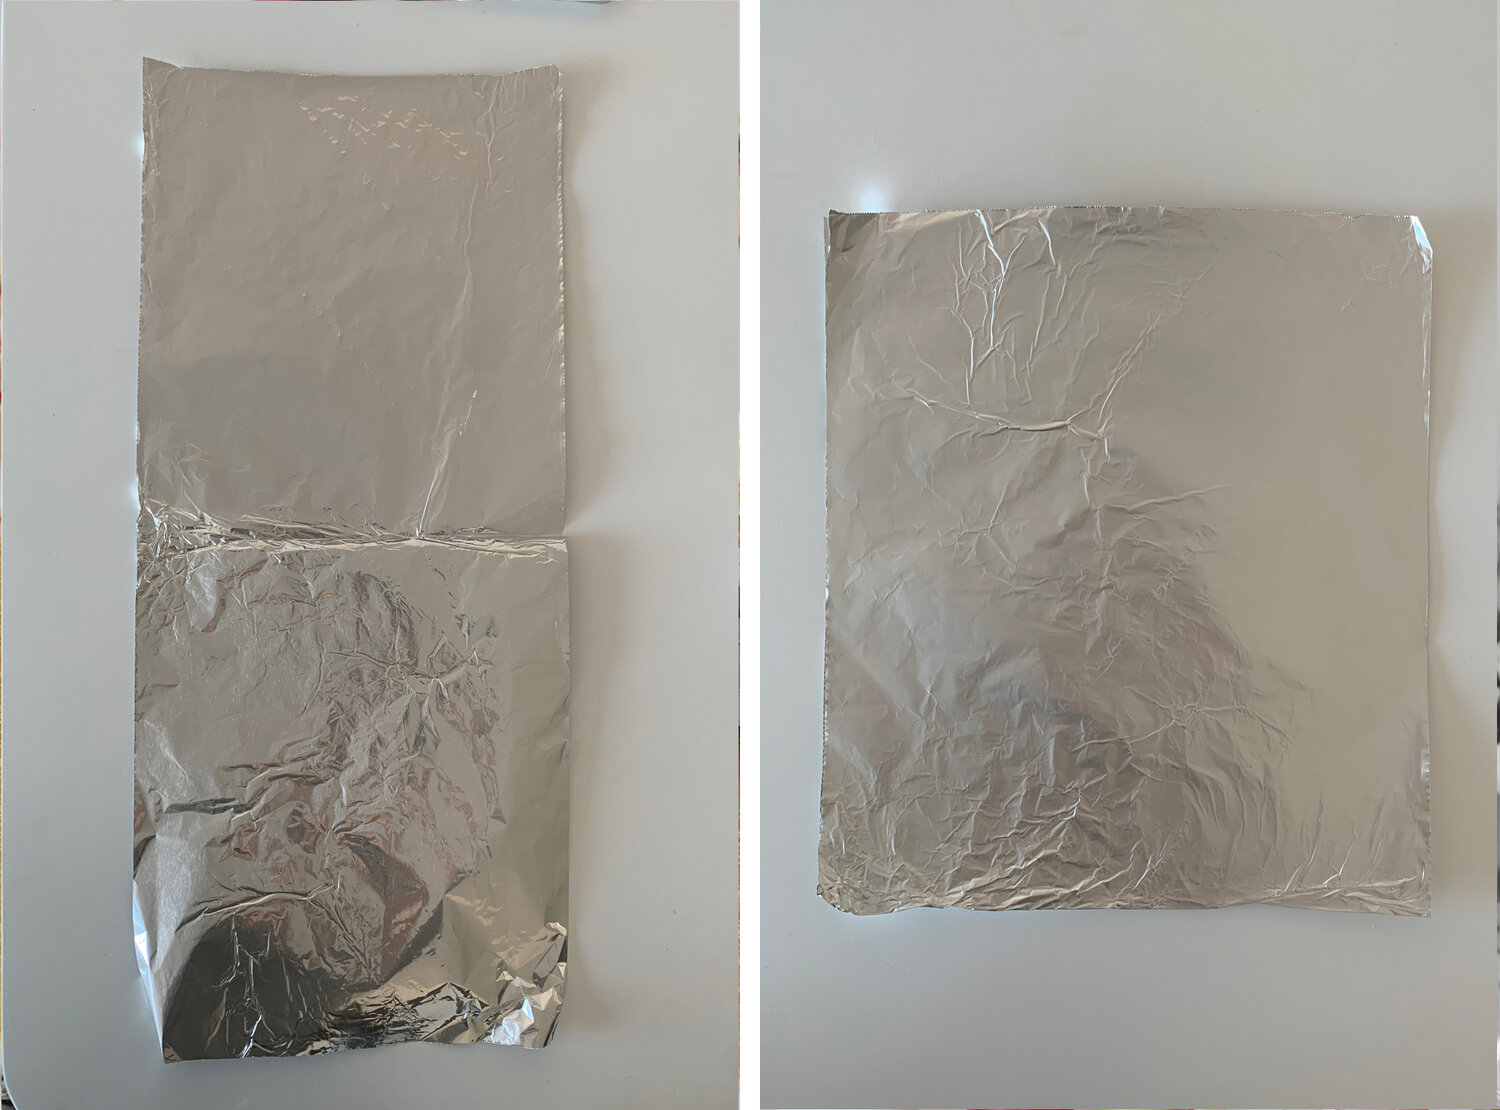
1. Make the cornucopia forms: Tear off a 24”-by-12” inch sheet of heavy-duty aluminum foil, then fold it in half to 12”-by-6”. My measurements are a liiiittle off in the photographs below, but you get the picture.
2. Roll the foil diagonally to form a hollow cone, attempting to keep the diameter (aka the opening of the cornucopia!) pretty wide (around 4”) at its the widest end.
3. Crumple up small pieces of foil and insert them into the cone-shaped form until the entire thing is somewhat rigid (this will help the dough keep its shape around the tinfoil “mold”).
4. Finally, bend the tail of the cone up, then down at the end—like a cornucopia! Place the finished form on a large, parchment-lined cookie sheet.
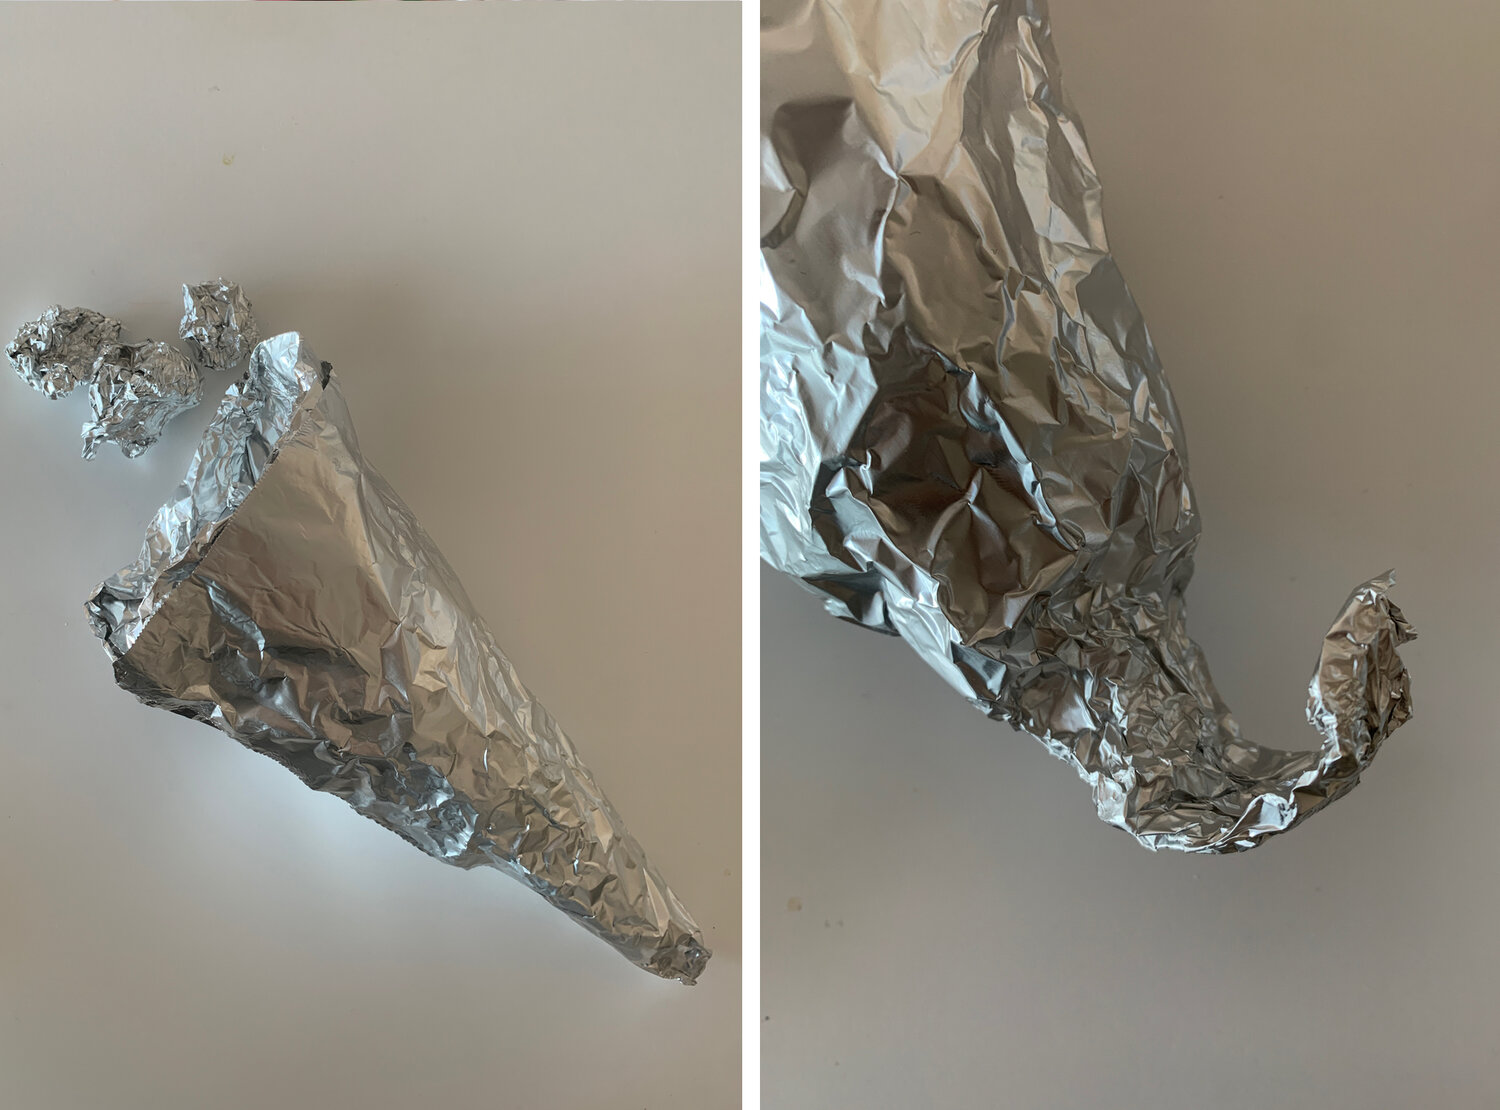
5. Repeat the same process above to create a second foil “mold” (you’re going to end up with two challah “loaves”—aka cornucopias—at the end of this process!). Place the second finished form alongside the first one on the same parchment-lined cookie sheet. Set aside.
6. Make the dough (for both of the cornucopia loaves): In a large bowl, combine 1 cup of the all-purpose flour with the yeast and 1 cup of warm water. Cover the bowl with plastic wrap and let it stand for 1 hour at room temperature.
7. When time’s up, add the eggs, honey, and olive oil on top of the flour-yeast mixture, and mix well. Add the remaining all-purpose flour, the bread flour and the kosher salt; mix until all ingredients are combined and a shaggy dough ball forms.
8. Turn the dough out onto a floured surface and knead for 2-3 minutes until the surface of the dough is smooth and you form a ball. Place the dough in a lightly oiled bowl, cover the bowl with plastic wrap, and let the dough rise for about 1.5 hours at room temperature or until doubled in size.
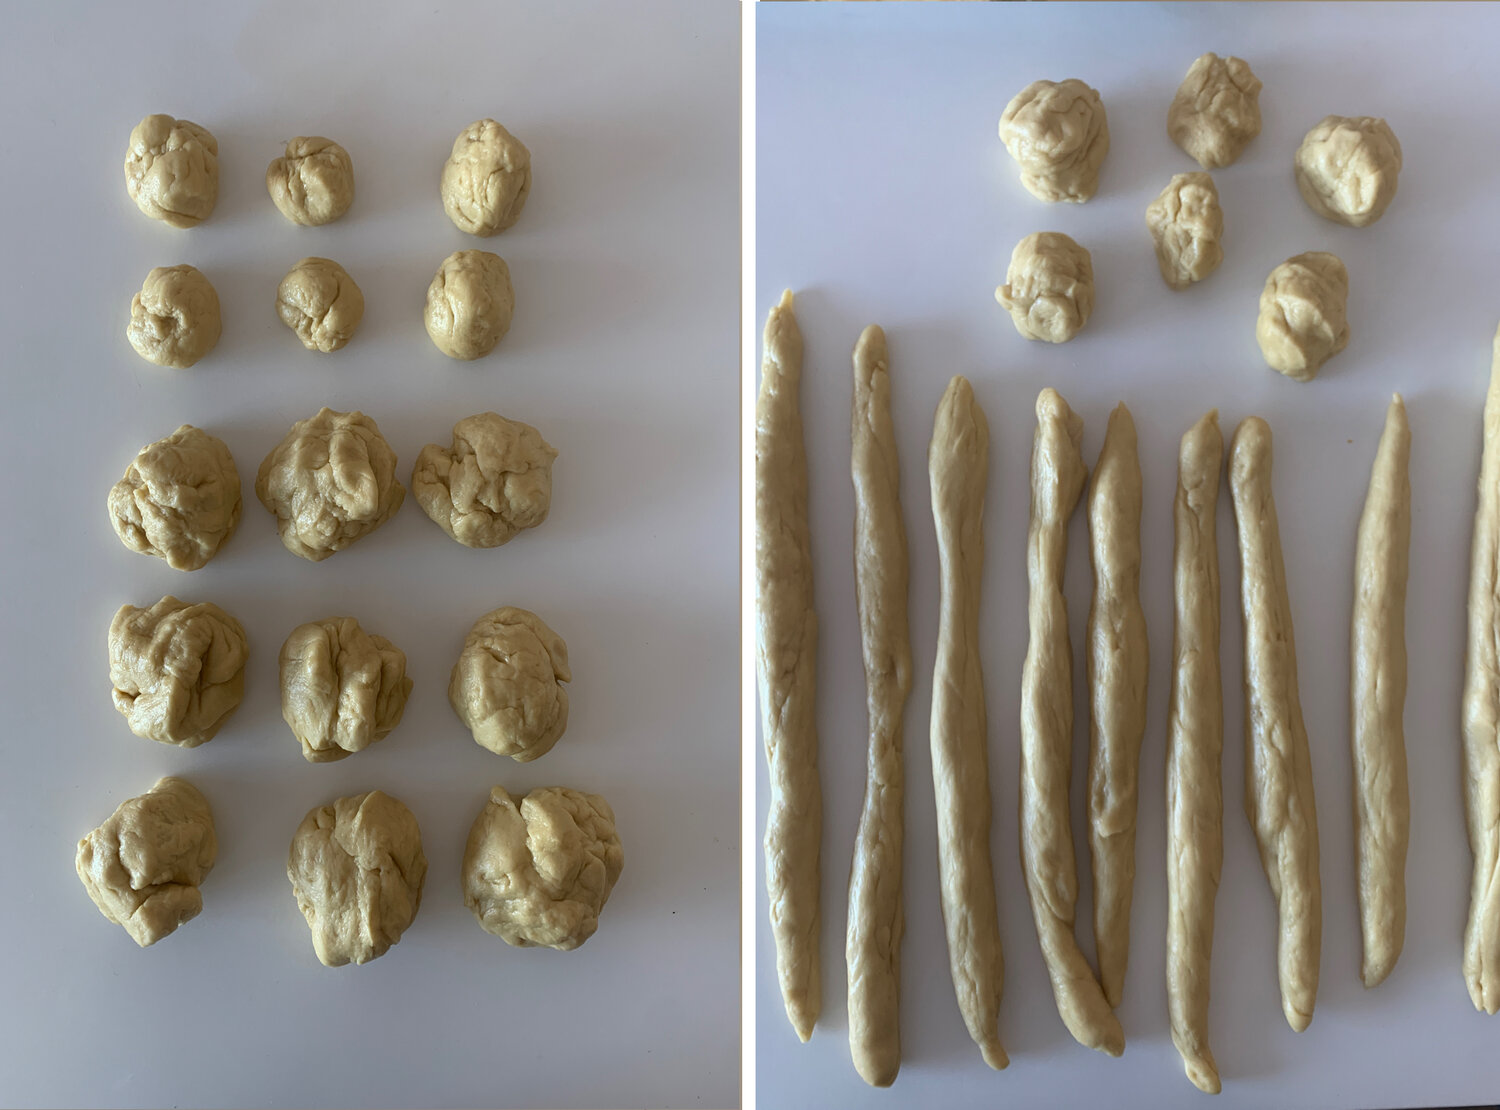
9. Form the dough cornucopias! Begin by punching down the now-doubled challah dough, then rip it apart into 9 “larger” balls (fist-sized), and 6 smaller balls (half-fist-sized). See above! Together, these 15 balls will make up your two challah cornucopia loaves.
10. Set aside the smaller balls for now; you’ll get to them shortly. Roll each of the 9 “larger” dough balls into respective long strands, as pictured above in the righthand photo.
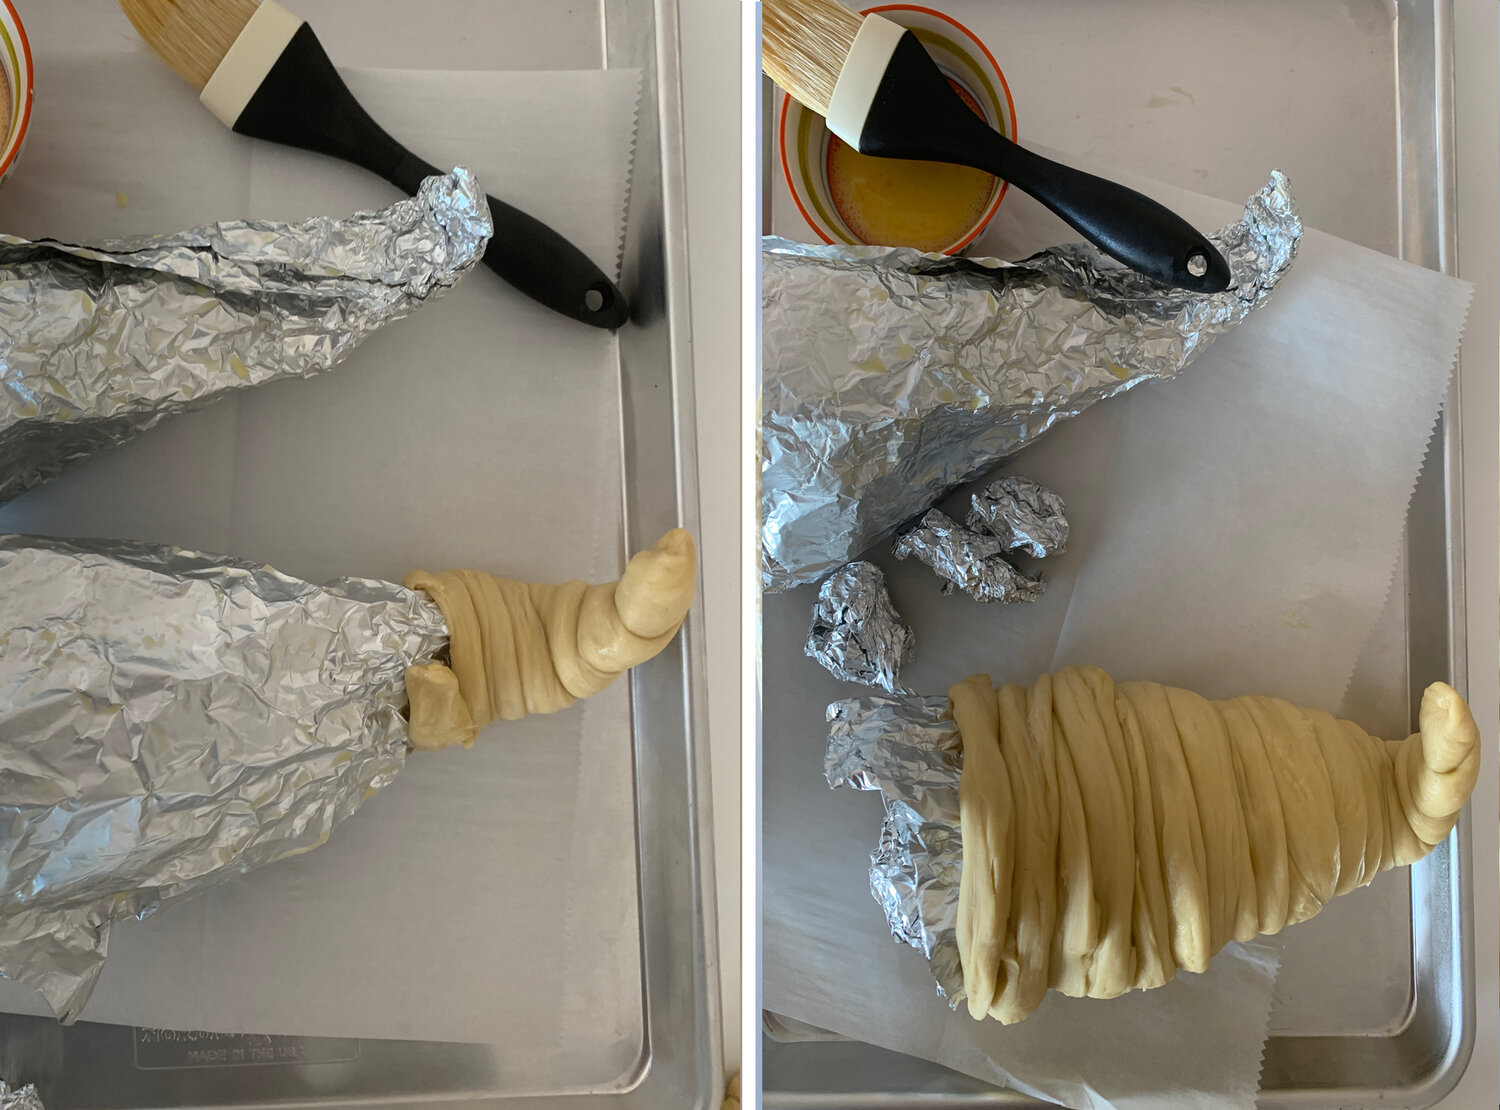
11. Begin wrapping one of the long strands around the narrow tip of the first cone form, pinching to secure. Continue wrapping around and around, moving along the cone toward the wider end. When you come to the end of that particular dough strand, brush the very end with egg wash and affix it to a new strand, then continue wrapping. If need be, you can pull gently on the dough to lengthen each strand.
12. Repeat this entire wrapping process on the second cone form using the remainder of the rolled-out strands.
Two tips here: One, make sure not to leave any air holes or gaps between the strands. In other words, you don’t want to see any foil peeking through your dough as you continue to wrap. Ever-so-slightly overlapping each “line” of dough is a good idea! You want this to be a fully solid cornucopia without any holes.
And two, when possible, try to hide the “beginning” of each new strand underneath the cornucopia, rather than finishing a strand on top of the cornucopia. That way, your guests won’t be able to see the break in the dough. Again, you can pull gently on the dough strands to make them longer so that you can “end” and “begin” each strand in a less visible spot.
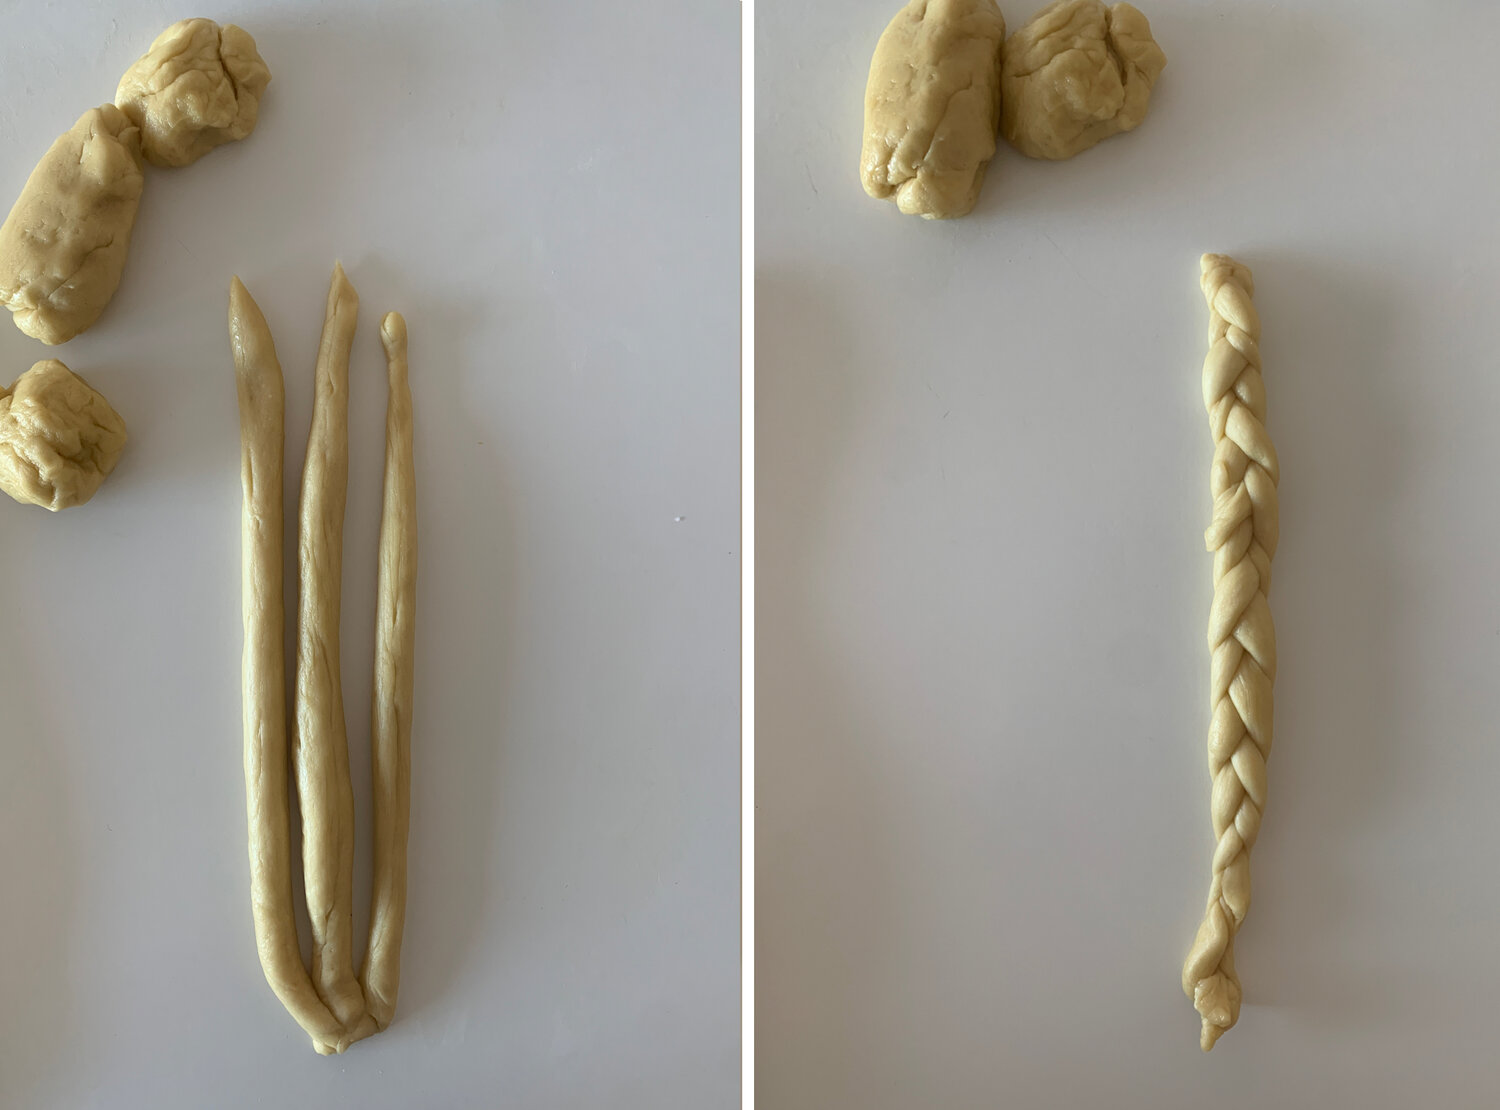
13. Return to the 6 smaller balls you’d set aside earlier! Roll each out into a long strand, then braid three of them together to create one braid, and braid the remaining three together to create another, separate braid. (The first braid will be used on your first cornucopia; the other will be used to decorate the second cornucopia.)
14. Brush the opening of the cornucopia with egg wash and gently press on one of these new braids to finish off the loaf with a lovely decorative opening. Wrap the ends of the braid underneath the loaf, where they won’t be seen, and pinch together to secure (or, if they’re not long enough to reach each other, simply pinch them into any dough on the underside of the cornucopia). Repeat, affixing the second braid to the second cornucopia’s opening. Then, cover both loaves loosely with plastic wrap and let them rise again for 20 minutes.
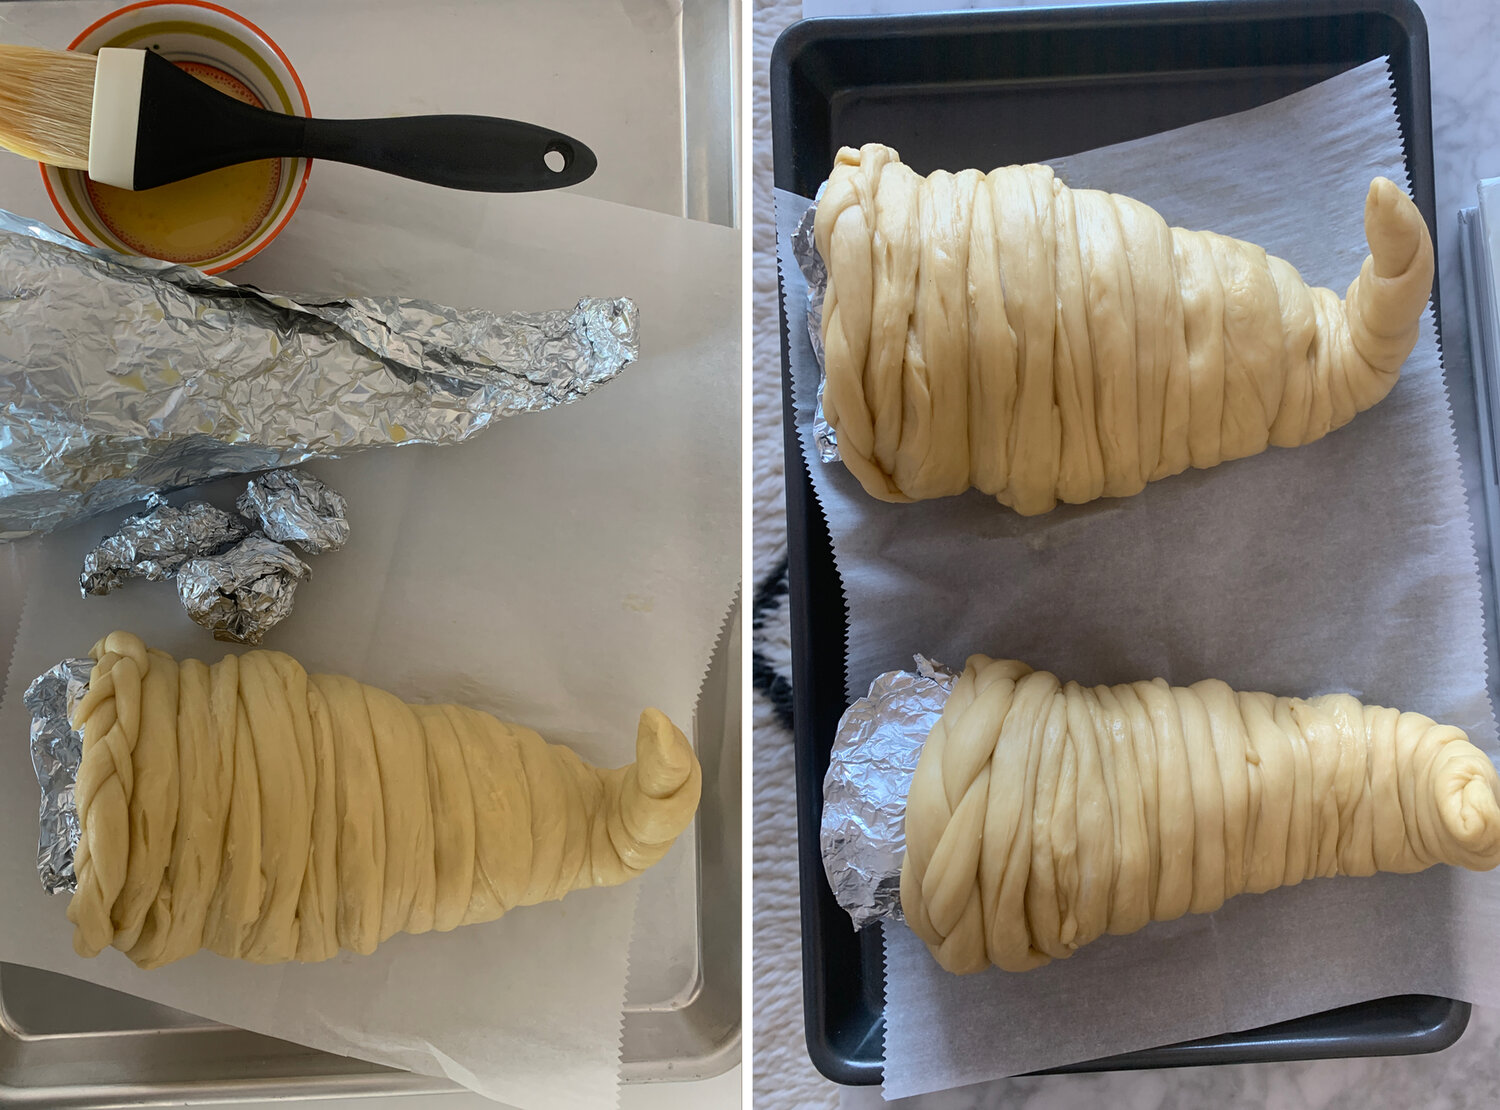
13. Bake the challah: YOU’RE ALMOST DONE!!! Yay. Preheat the oven to 350° F. Remove the plastic wrap from both loaves and coat them with egg wash using a pastry brush, making sure to get in all the nooks and crannies. Bake for about 35-40 minutes or until dark golden brown; checking on the loaves frequently during the baking process.
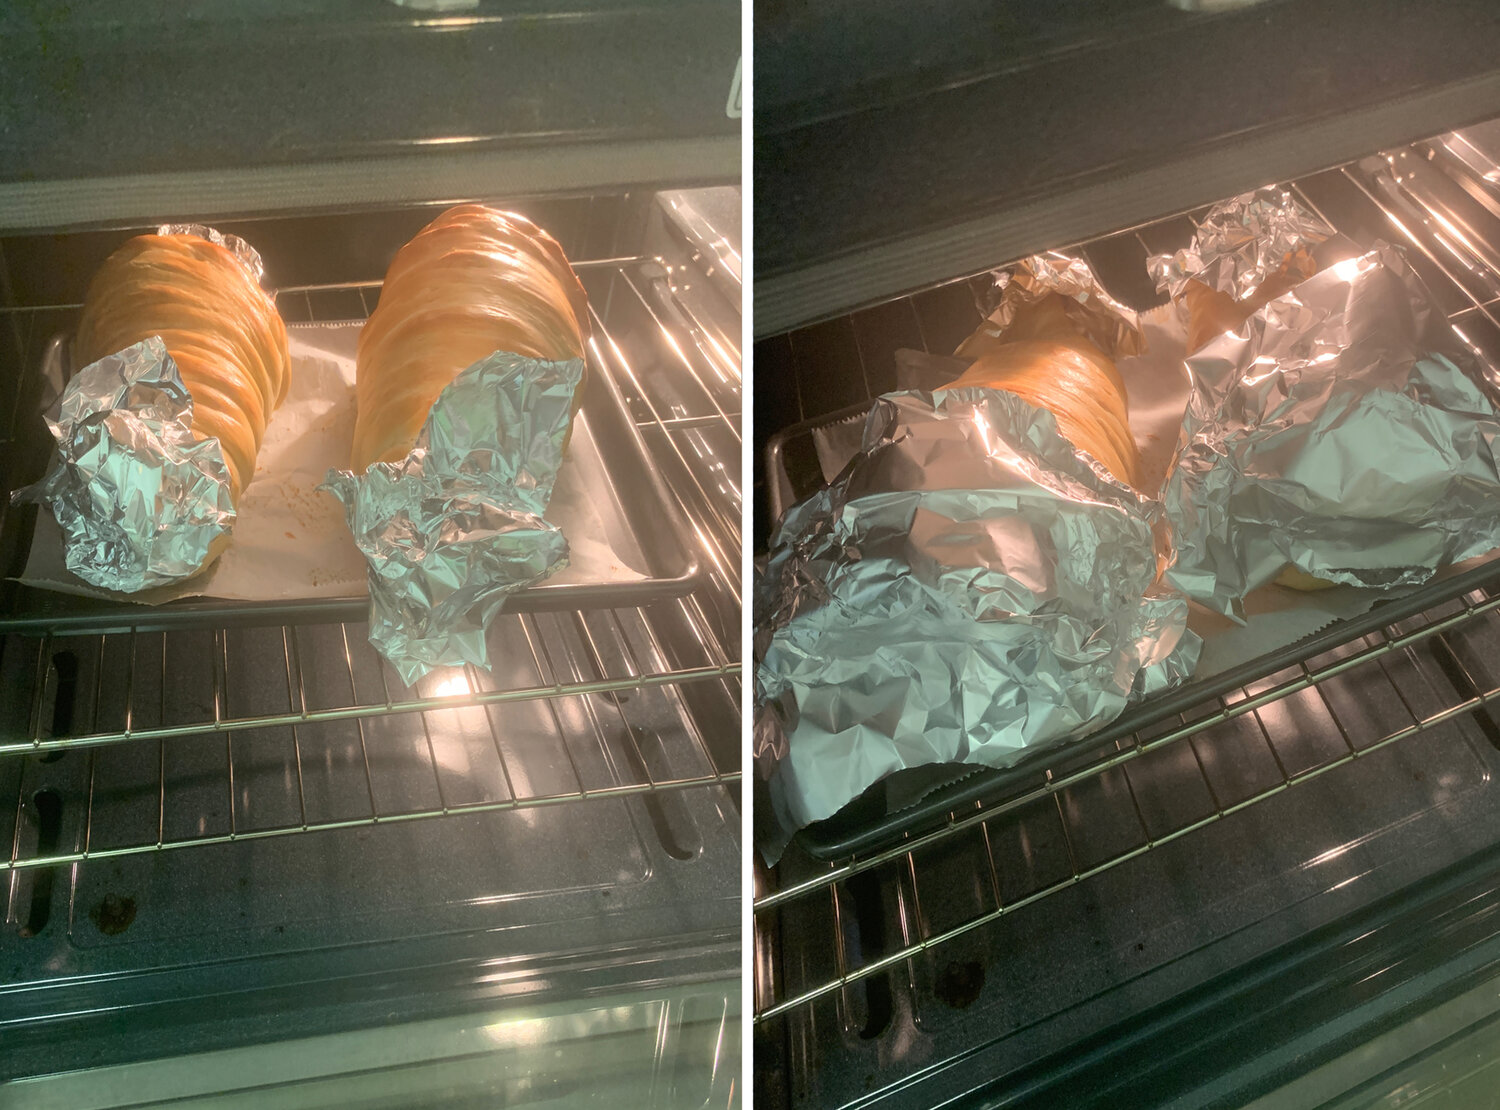
Tip: During this part of the process, you may notice tips of the cornucopias browning faster than the other parts of the challah around 20 minutes in; if that’s the case, you can carefully and quickly cover each tip with a small piece of aluminum foil to slow their browning process. (First remove the pan from the oven. Do not work within the hot oven.)
Tip 2: Ten minutes later, or around 30 minutes into the baking process, you may notice the braided crowns browning rapidly as well, because they are closest to the heat source. You can carefully and quickly cover those with foil as well if that’s the case, but you will want to remove the pan from the oven before doing so. Do not work within the hot oven.
Cue hilarious photo:
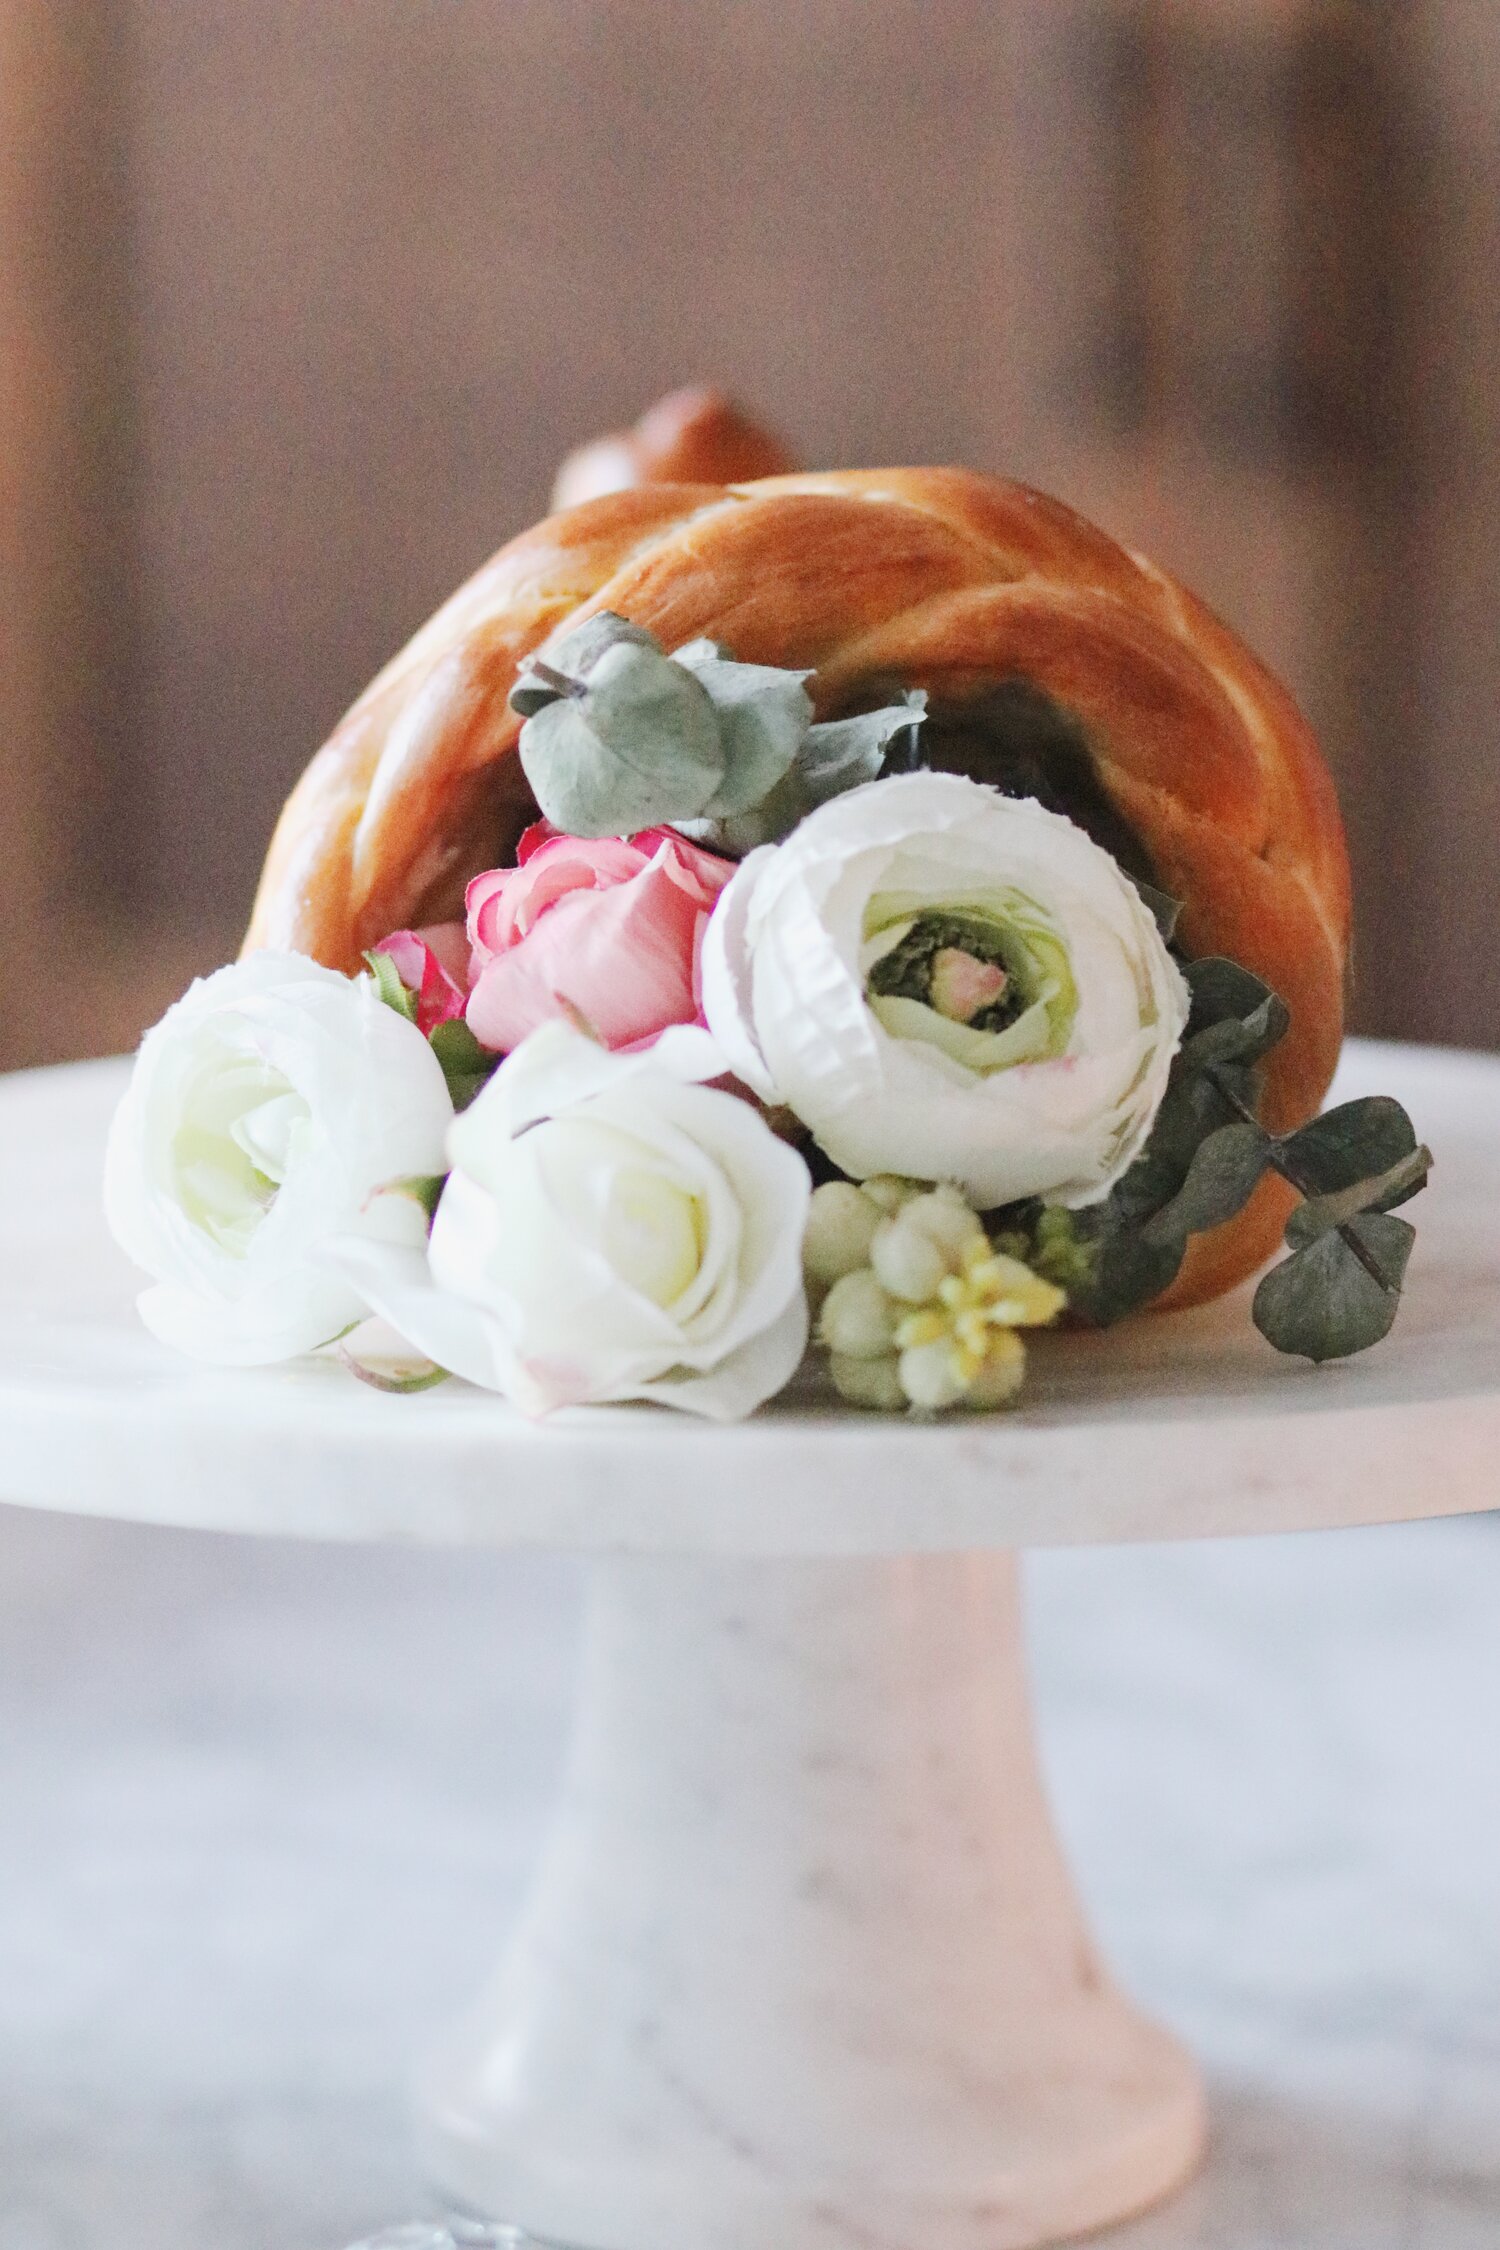
14. Remove the pan from the oven and let both loaves cool completely on cookie sheet on a wire rack without removing the foil. Once they’re entirely cool, you can carefully remove as much of the foil as possible, fill them with whatever garnishes / fruits / candies / faux flowers you’d like, and serve as soon as possible! You can freeze the cornucopia at this point, but in that case, be sure to leave all of the foil in the bread for support and remove only when thawed.
15. Take a ridiculous amount of photos. You’ve earned it.

I can’t wait to try this!!! Question: the recipe says it makes two cornucopia, but after the dough rises, the instructions are to divide into the large and small balls. Should I divide in two first, and then each half into the 9/6 balls? Thank you!!!
this was SUCH a good question – I edited that step slightly to make sure it’s clearer. no, you only need those 9 larger balls and 6 smaller balls! together, they comprise the dough needed for BOTH of the challot. 🙂 I realize the odd number of balls is a tad confusing, but as you’ll find out soon, whether the number is even or odd is irrelevant because all of the balls eventually become part of a long, continuous strand. hope this helps!
OMG just made this!! How easy and fun it’s been!’