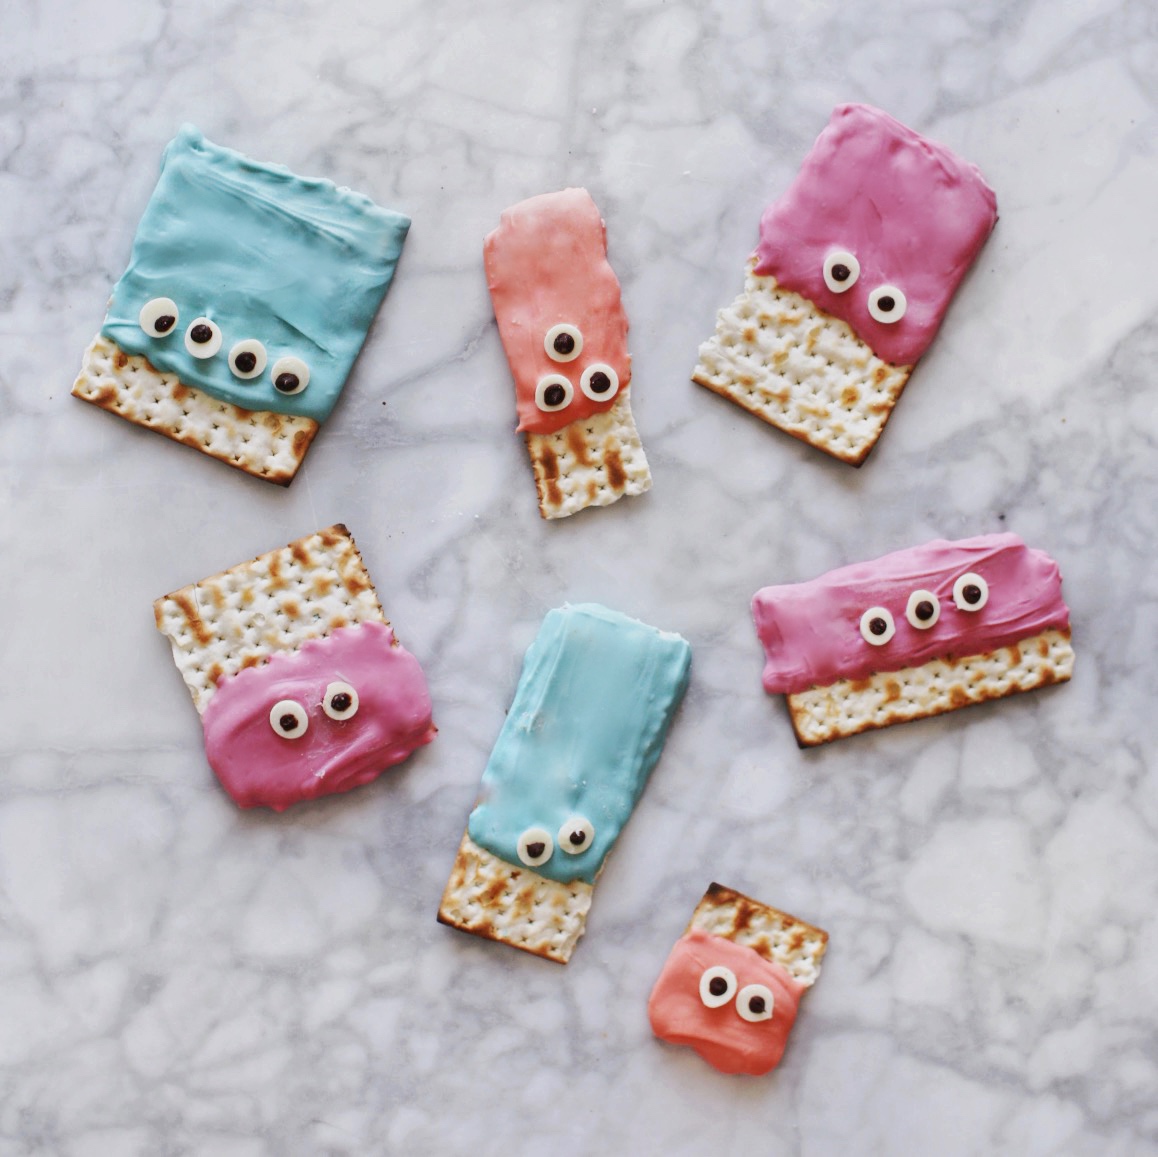
There are authentic Passover recipes, and then there’s…whatever this is. Either my creative peak or my absolute rock bottom. Honestly, I’m not sure.
But before you write this off as a kid-friendly project – for the record, I did not have children when I first made these. Not even child, singular. These are just fun for everyone. They’re basically just matzah dipped in pastel-colored white chocolate, you could also use candy melts. And I was going for “friendly monster” with the pastel hues here, but you can really customize this whole situation however you want. For the eyes, I wanted to make sure this was really easy to do with kids, so I just used a fork dipped in melted chocolate chips. You could use a toothpick, too. Or you could get *really* fancy and pipe the chcolate, but…again, these are matzah monsters, friends. Let’s relax.
Historically accurate Passover fare? No. Outrageously fun? Oh yes. However you choose to employ these little monsters, the simple tutorial is ahead for the taking. Let me know if they’re a hit at your Seder!
Print
Matzah Monsters
- Yield: 16–24 “monsters” 1x
Description
The cutest kids’ table decoration or just-for-fun Passover craft.
Ingredients
- 3–4 standard-sized pieces of matzah
- Parchment-lined baking sheet
- A few small, microwave-safe bowls
- 3 cups candy melts in various colors (1 cup per color)
- Coconut oil, if desired (makes the finish smoother and less bumpy; I’m not a fan of coconut oil so I skipped it)
- 1/2 cup white chocolate chips, for the “eyes”
- Handful semisweet chocolate chips
- Toothpick or very small paintbrush
Instructions
- Break your matzah pieces into small shards (I like the look of an asymmetrical, uneven assortment—fits with the “monster” theme and gives each one a unique personality, I think!). Set aside on your parchment-lined baking sheet.
- Using one of the small bowls, melt 1 cup of the candy melts (just one color) in 20-second increments for about 1 minute, removing the bowl and stirring after each trip to the microwave, until completely melted. If desired, stir in about 1/2 teaspoon of coconut oil to the candy melts to get that extra-smooth look—I didn’t do this for mine, but it’s an option.
- Use a spoon to coat 1/3 of your matzah pieces with the candy melt mixture, leaving a small section of the matzah untouched (this way, your kids or guests will know that there is, in fact, matzah underneath all that color). Place each piece onto the parchment-lined baking sheet, then immediately top with a few upside-down white chocolate chips wherever you’d like the “eyes” to be (i.e. the pointy part of the chocolate chip goes into the colorful, melty part). Remember, there’s no limit to the number of eyes a monster can have. It’s science.
- Repeat with remaining candy melt colors and matzah pieces, then let the monsters set at room temperature for at least 30 minutes.
- Finish by melting the semisweet chocolate chips in the microwave—because there are less of these, they shouldn’t require as much time before they’re melted. Dip a toothpick or small paintbrush into the melted chocolate, then “paint” the shape of a pupil onto each of the white chocolate chips. You can have some of the eyes looking in different directions, you can add eyelashes…really, feel free to get creative with it!
- Wait another 30 minutes for all of the elements to set at room temperature, then carefully peel each monster off of the parchment paper, serve, and enjoy. To store, place in an airtight container in the fridge until ready to use—you can place a piece of wax or parchment paper between each place monster to keep them from sticking together. The monsters can be refrigerated for up to a week or frozen for up to three months in an airtight container.
