Most bloggers: Hey! Try this two-ingredient, three minute recipe! It’s easy, fast, and fun.
Me: Hi! Try this 23,049-ingredient science experiment involving tools and techniques you can’t pronounce. It’ll take three years off your life and leave you in tears on the side of the road somewhere, begging for mercy and your life back.
Shall we?
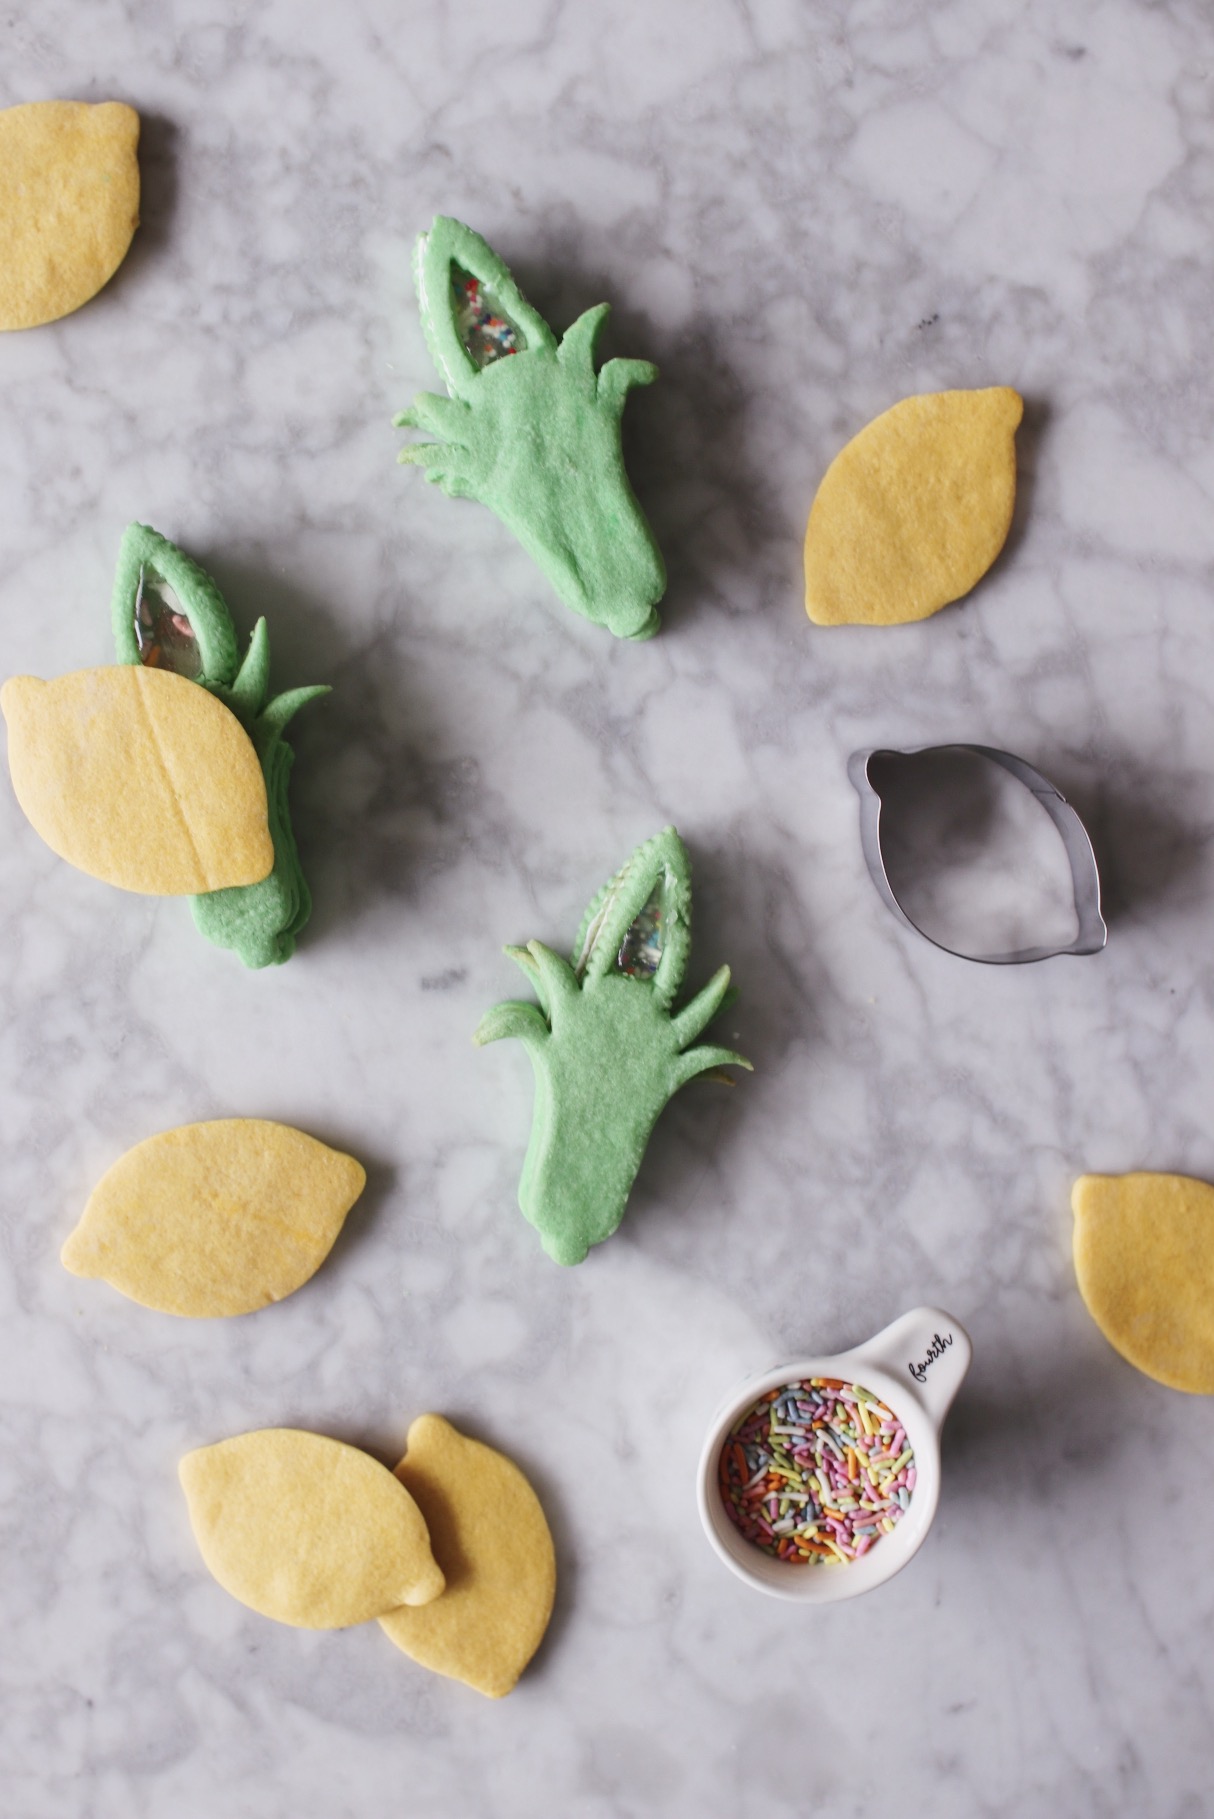
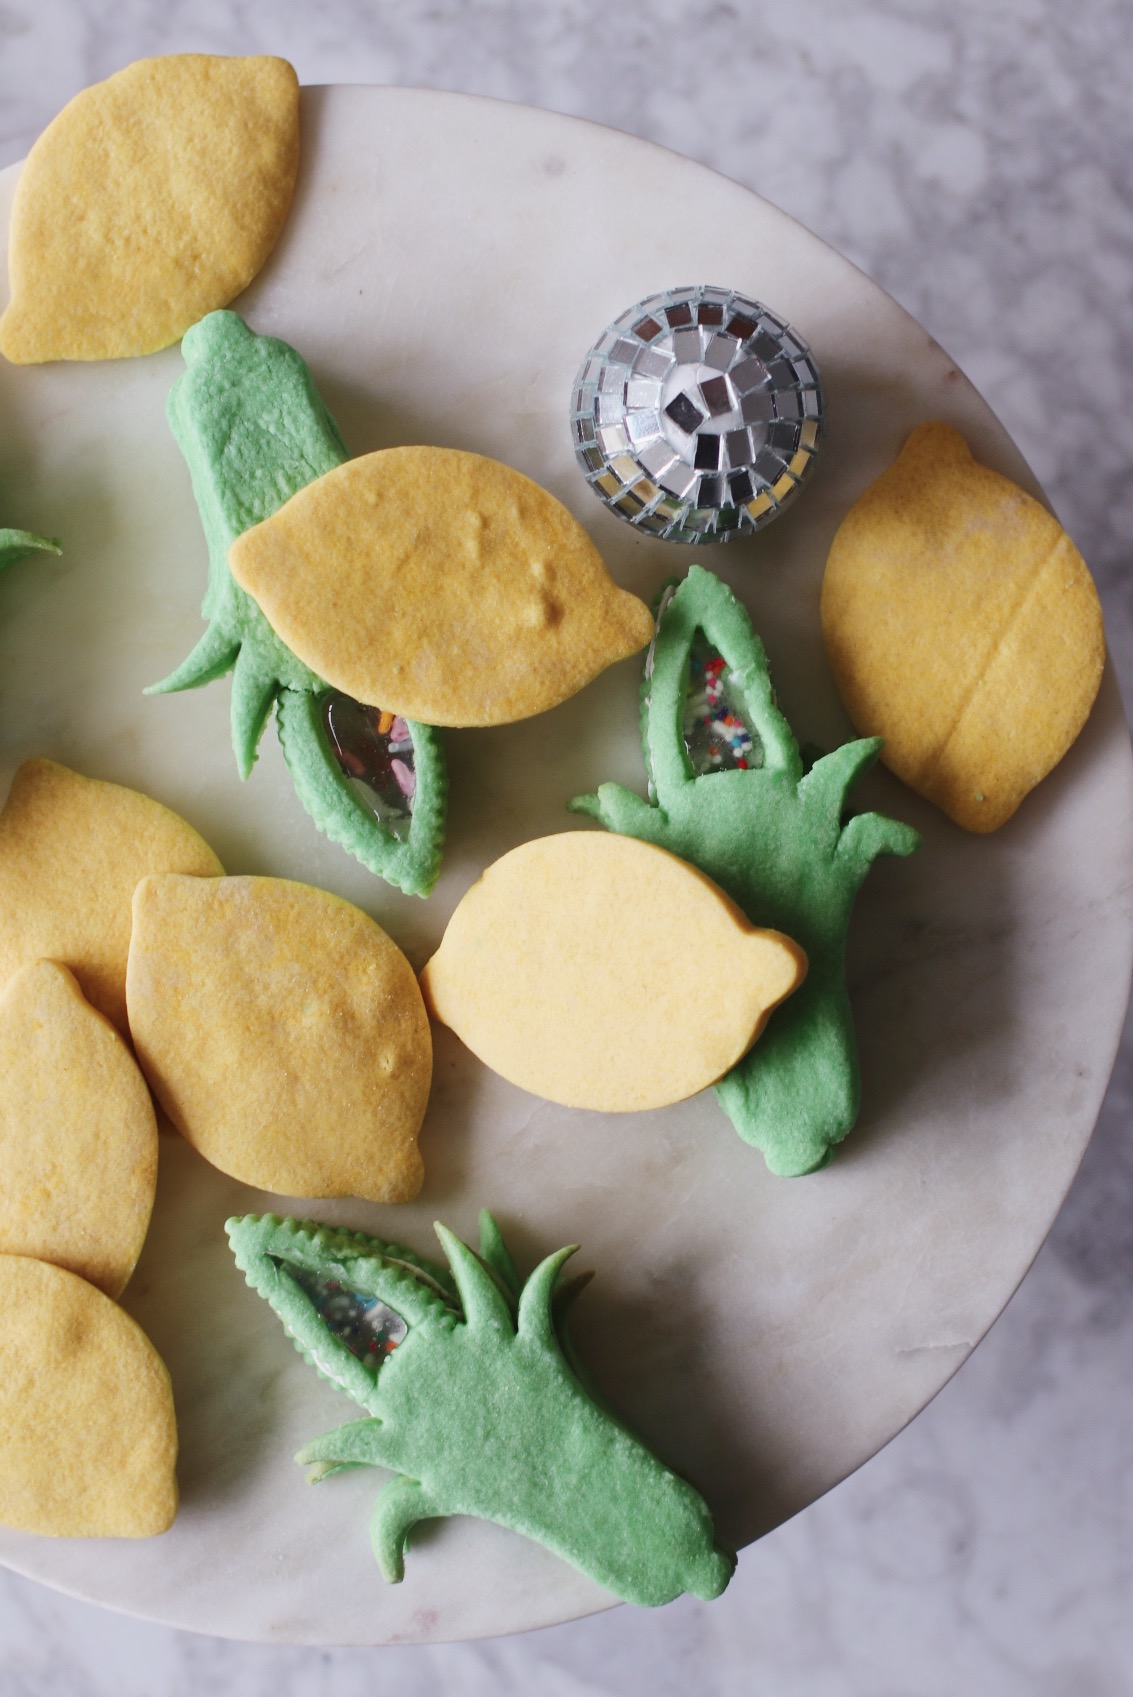
LULAV AND ETROG COOKIES!!!!!! I’m so excited about these. YES, the lulav cookies really shake. They make noise, too, which isn’t really a “lulav thing,” but, well, it’s a “fun thing,” and we make exceptions for fun things around here.
Speaking of “around here” (goodness, this is a lot of scare quotes for the first two paragraphs of a post)…if you’ve been hanging around my blog for a while now, this probably isn’t your first time seeing “shaker cookies.” I made these similar “edible grogger” ones back in March for Purim after scrolling past a “shakashaka” cookie (real name!) on Instagram and falling deeply, madly in love. The two cookies are a liiitle different from one another, but both involve isomalt, a kosher sugar substitute derived from beets—it’s what helps make those little “glass” windows.
I guess I’m just a scare quotes kinda gal now.
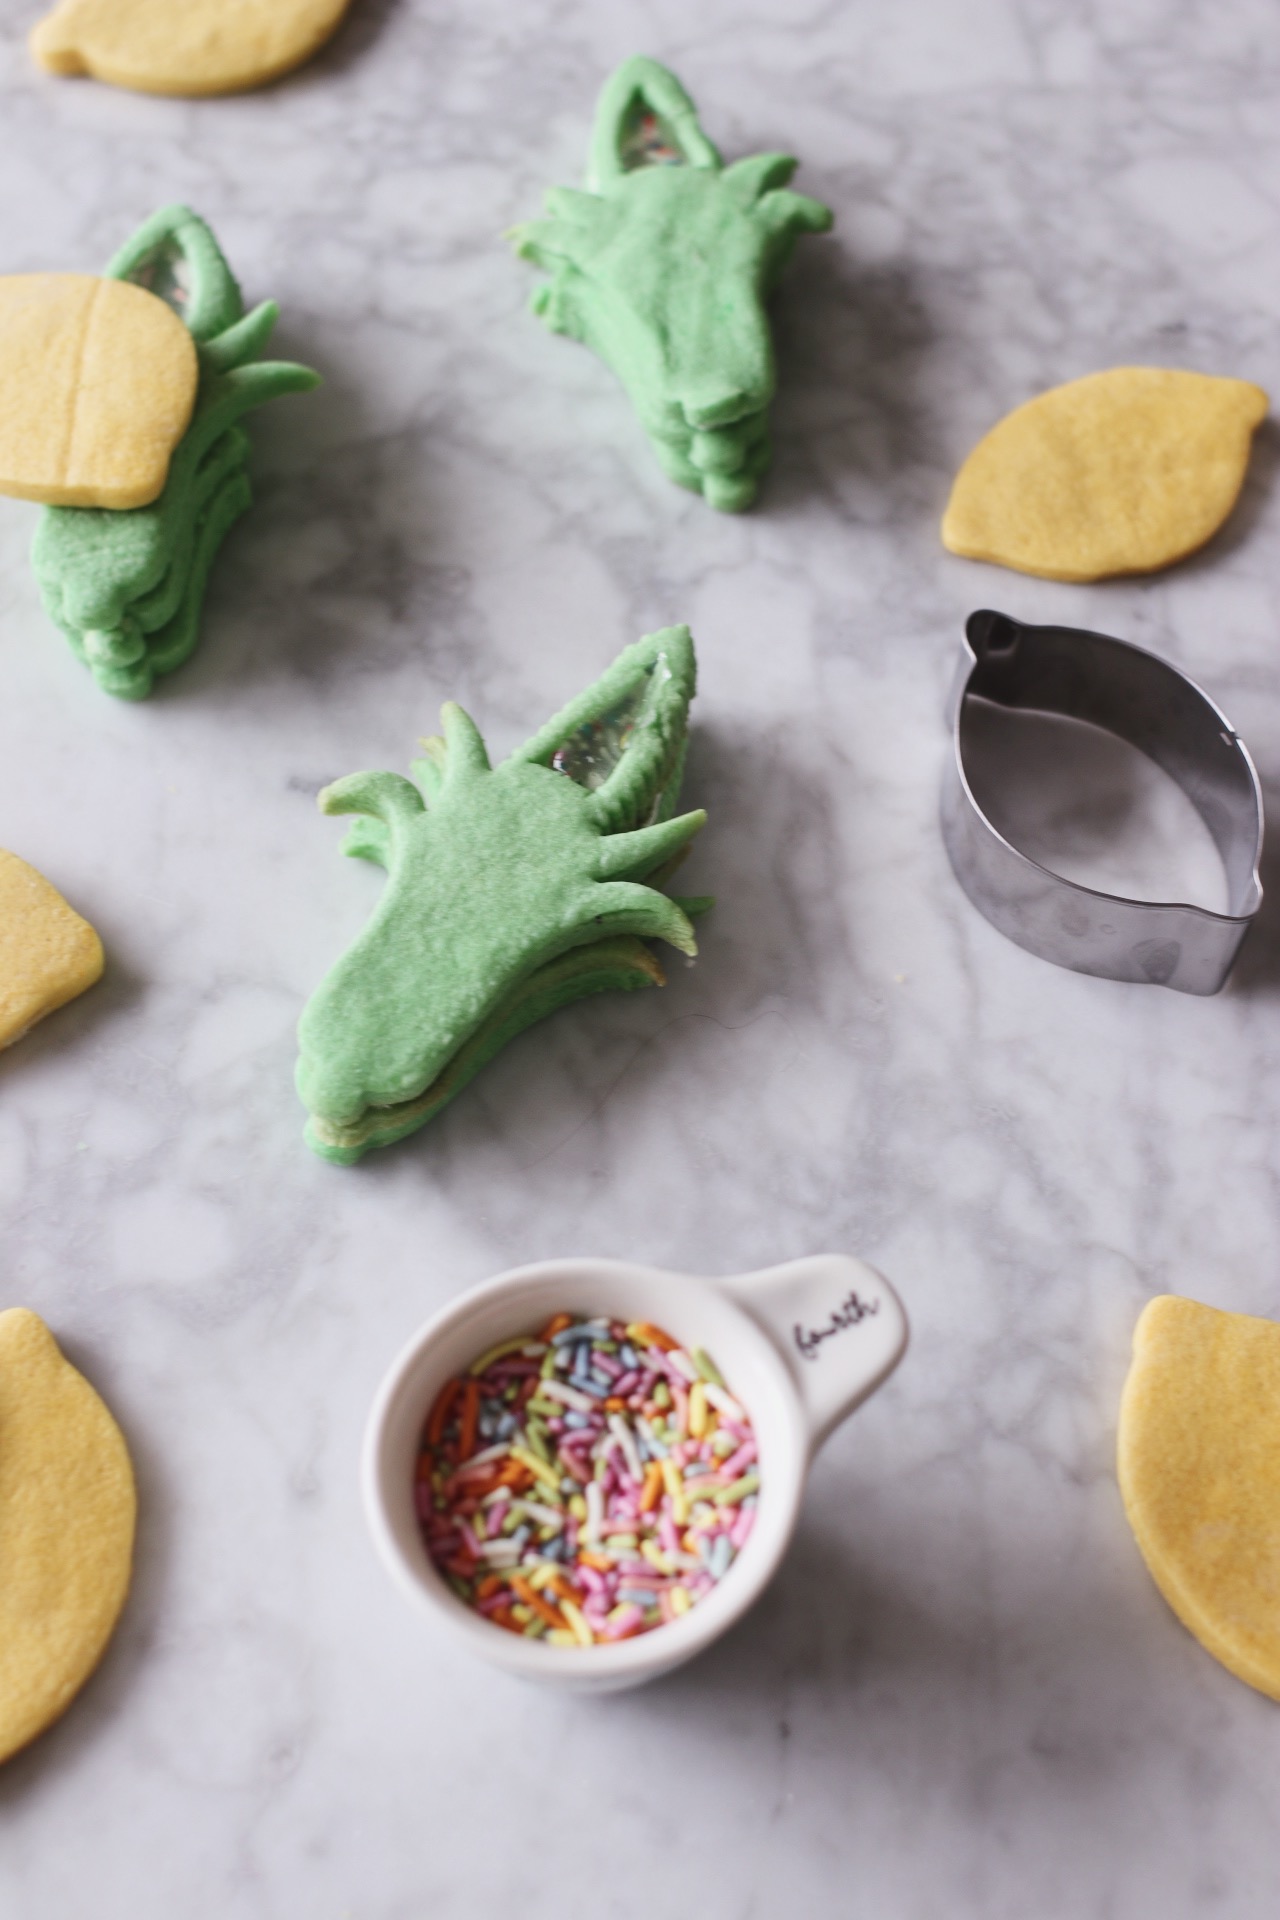
It was actually right after I posted that grogger cookie that I came up with the idea for these lulav ones. I mean, it’s the other Jewish thing you “shake”—so it felt appropriate! And in my family, Sukkot’s a big, big deal, so the lulav thing came to mind pretty quickly.
In fact, if Sukkot isn’t already on your “favorite holidays” list, you’ve probably just never been to Sukkot at the Lowin house. Every single year, we re-build a 40-year-old sukkah that my Zeide (a carpenter!) made by hand (more on that over here). We decorate it with paper chains and branches, we eat under the stars every night with blankets, we shake the lulav and breathe in that glorious etrog fragrance, and it’s just one of the best weeks of the year.
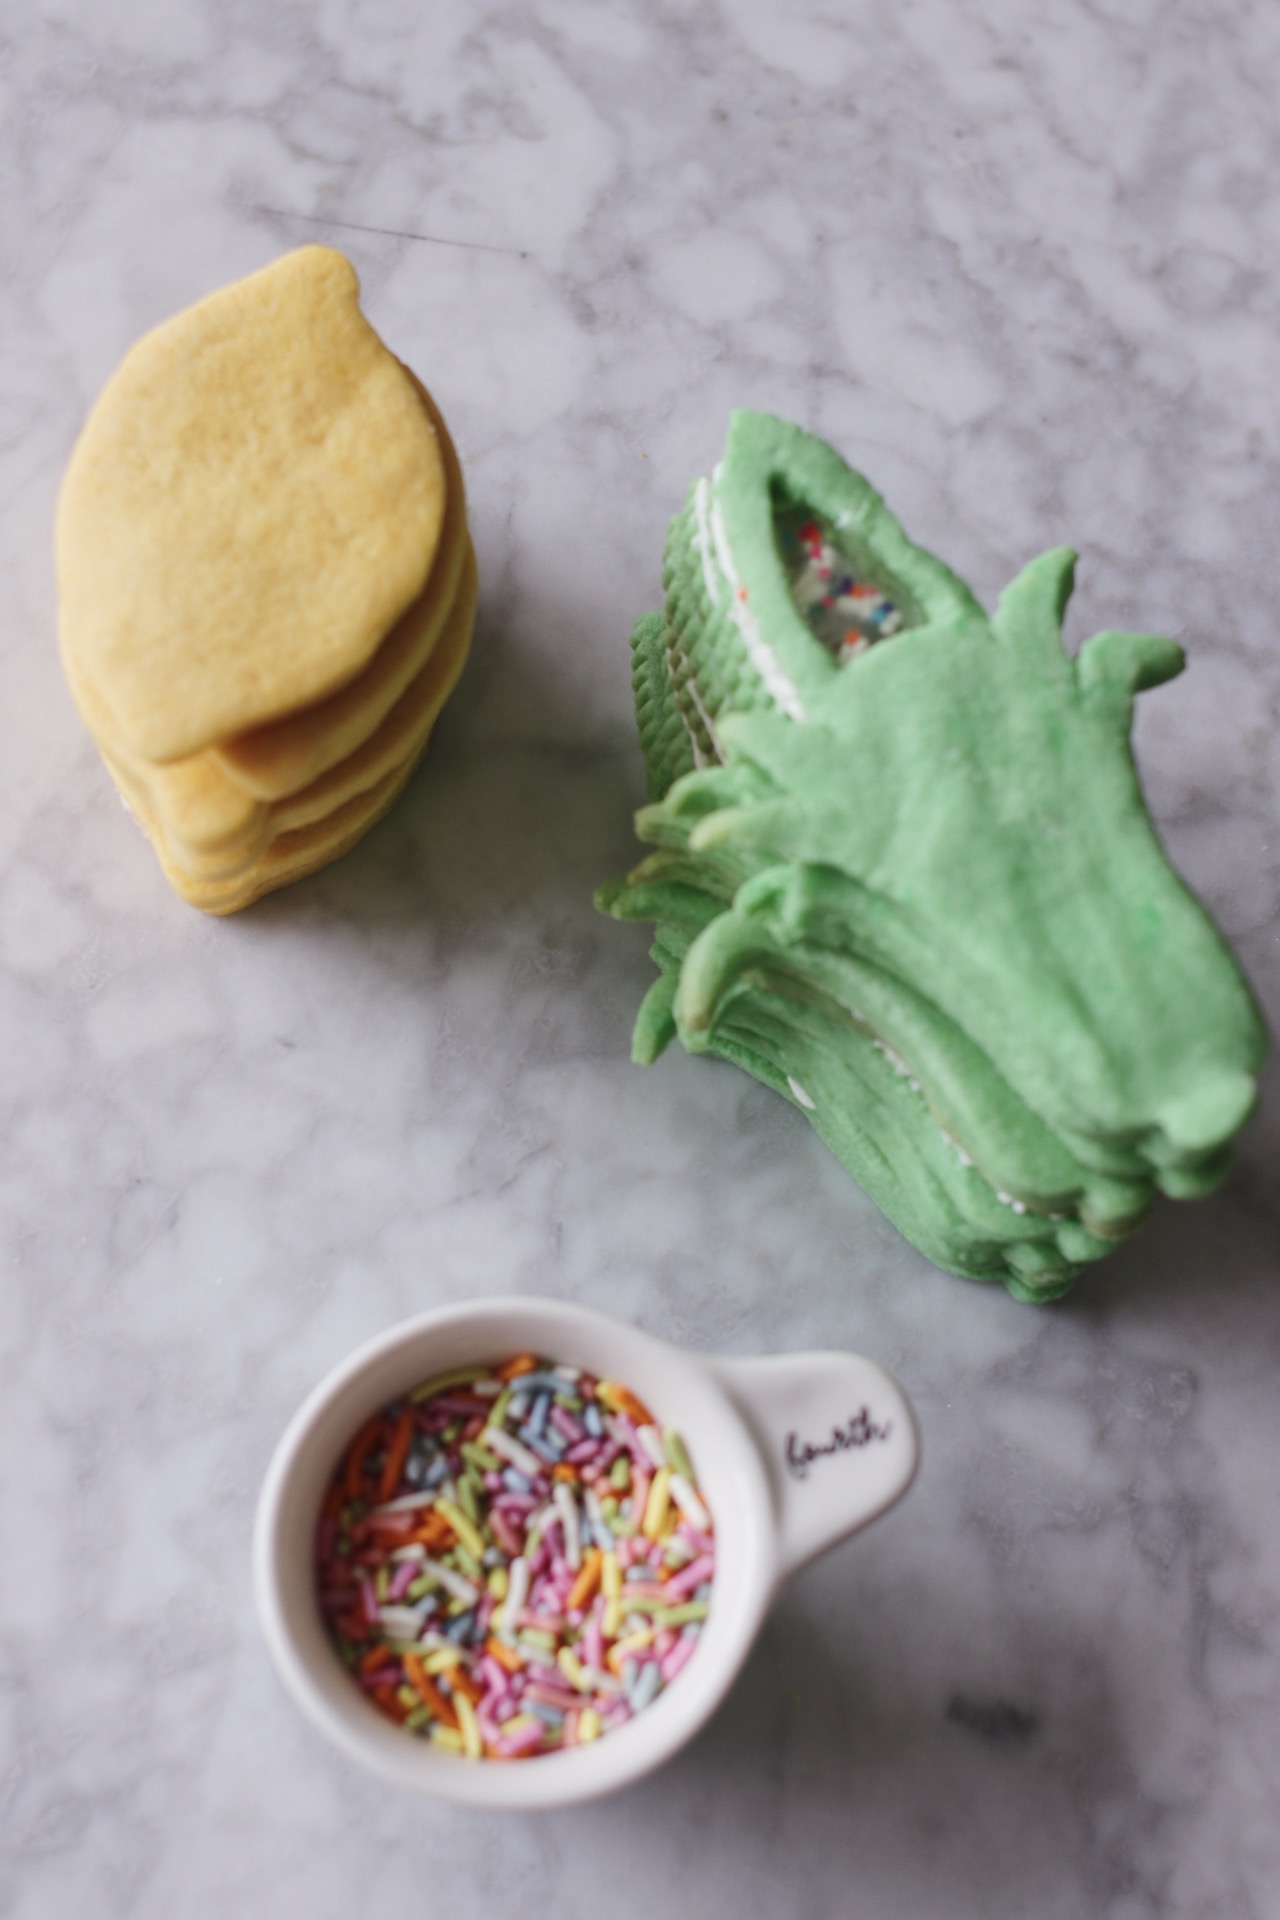
These shaker cookies are my way of paying tribute to all that! They do take a while to make, but they’re so fun (and by the way, because I get this question a lot: the sugar cookie part is actually super soft and chewy!).
One other note: For some absolutely BIZARRE reason, there’s no such thing as a lulav cookie cutter, so I invented one using a corn-on-the-cub cutter and a paring knife—that’s the only thing that might be tough for you to emulate unless you order the exact supplies I’ve listed below. But I do think it’d be possible to get creative and make these with whatever lulav-shaped cutters you can find. Or just freehand it!
…Nah, on second thought, don’t freehand it. The cookies won’t line up nicely, and that’s sort of important for shaking purposes.
But anyway, beyond that tricky cookie cutter business, if you follow the steps I list out below, it should be fairly straightforward (if time-consuming).
Have fun, and as always, let me know if you do end up making these!
A Step-by-Step Guide to Creating These Cookies
First, call your friends and family and let them know you will be out of commission for the next two weeks.
Just kidding.
Sort of.
But really, I wouldn’t attempt to start and finish these cookies in one day. It’s a little more enjoyable if you pace yourself—maybe you make the cookie dough one day, cut and bake the cookies the next, make the little glass windows the following day…you get it.
Then, prepare your materials and ingredients. You will need:
- 1 batch of your favorite sugar cookie dough (for the recipe I’ve linked here, make the dough up to the point just before when you’re supposed to roll it out and throw it in the fridge to chill!)
- Cookie cutters that look like a lulav and an etrog (I went with the lemon from this set for the etrog, and this corn-on-the-cob-cutter for the lulav, but I can imagine any lemon or corn-on-the-cob cutter working nicely)
- A paring knife or other small kitchen knife
- 1 batch of royal icing
- Sprinkles! (you’ll want to keep the sprinkles fairly small—nonpareils also work nicely—because there isn’t as much room in these cookies for them to “move around” and make that fun shaking sound)
- 1 cup isomalt crystals
- 1/8 cup (2 tablespoons) water (note: the general rule of thumb here is, for every 1 cup of isomalt you use, you’ll want to use 1/8 cup of water)
- A small and very clean oven-safe pot (any foreign materials / dirt can cause the isomalt to discolor or warp)
- A very clean metal spoon
- A sheet of flat, un-creased, clean parchment paper
- Canola oil (no more than a tablespoon or two) and paper towels, for wiping the “windows” and de-fogging them before assembly
Next, make two batches of cookie dough and chill.
Color one yellow using a few drops of yellow food coloring (mix it into the dough before refrigerating), and color the other green using a few drops of green food coloring (again, simply mix in the color before refrigerating).
While the green dough continues to chill, cut out the etrog shapes from the yellow dough and bake.
Go ahead and use your etrog-shaped cutters to cut out these cookies, then bake and let cool according to the recipe’s instructions. Set aside in an airtight container until you’re ready to eat/gift/share the cookies. From here on out, we’re just going to be working on those trickier lulav cookies!
Remove the green dough from the fridge and cut out the lulav shapes.
(Note: Make sure this batch of dough isn’t rolled too thin; you want these cookies to be hefty enough to provide some real height (.25″ thick works nicely), because that’ll allow the sprinkles to “move around” within the glass window.)
Once the dough is rolled to the proper thickness, use your lulav-shaped cutters to cut out this next batch. Then, create a second, triangular cut using a paring knife to create the hole for the isomalt candy glass “windows,” as shown in the photos here. Important: Try to keep these window holes relatively uniform in size so that when the cookies eventually get stacked on top of one another, the window more or less “match up” and create a clear, truly see-through window all the way through. They don’t have to be perfectly uniform, though.
Here’s another important note: To make ONE of these lulav cookies, you’re going to need a total of THREE sugar cookies. This is because the final cookie is actually a layered stack, in which the bottom and top cookies are filled with isomalt and feature that fun “clear glass” design. The middle cookie is not filled. It’s just there to provide a little bit of extra height so that your sprinkles have space to move around inside of the other two cookies. Otherwise, they’d just get smushed in there.
If you roll your cookies too thin, you’ll actually have to go with FOUR cookies to provide that extra height and ensure that there is room for the —two un-filled inner cookies. For my grogger cookies last March, I actually did go with with FOUR cookies because my sprinkles were enormous and I wanted to give them even more room to roll around in there.
Bake and cool the cookies.
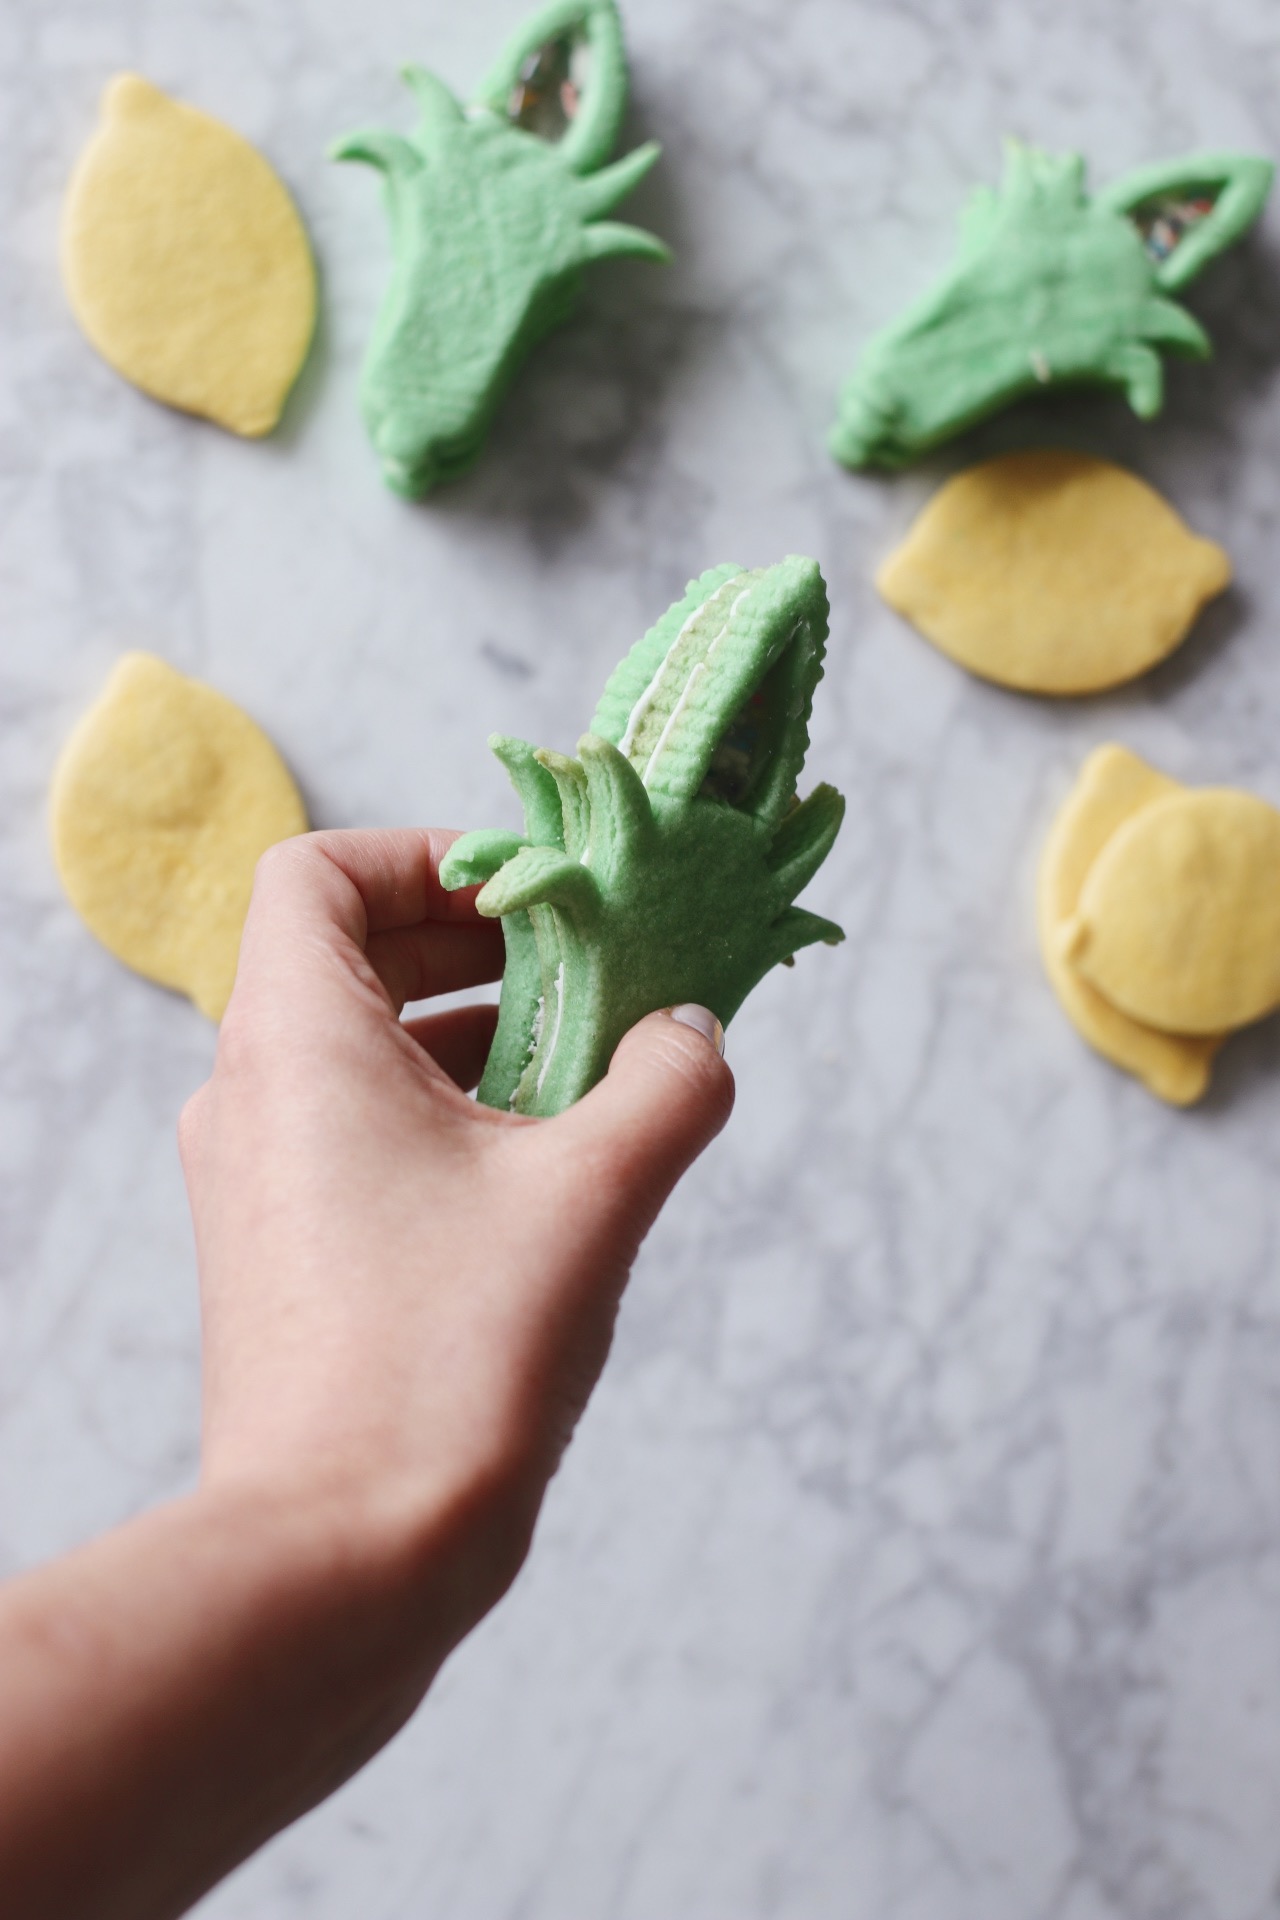
Once the cookies have cooled, get them prepped and ready for the isomalt.
Put 1/3 of the cooled cookies aside—those will be your “un-filled” ones. Place the rest of the cookies onto your clean, un-creased parchment paper (remember, any extra crumbs on this paper might get absorbed into the isomalt coming its way!).
Melt the isomalt carefully, properly, and safely.
Safety note: isomalt gets extraordinarily hot and you should be extremely careful when heating it! Best to get kids out of the kitchen while this is happening, and just be very cautious not to burn yourself with the mixture.
I also highly recommend reading this whole section BEFORE beginning to work with the isomalt to be sure you have all the proper tools and equipment ready to go. It’s a fast, finicky, delicate process; you don’t want to be rummaging around in your kitchen while this is all going down. But don’t be deterred: You can do it!
To begin, preheat the oven to 265 degrees Fahrenheit.
Pour your isomalt crystals into a small, oven-safe pot and spread them out somewhat evenly.
Next, place the pot over medium heat and resist the urge to touch or adjust the isomalt crystals—no stirring! wait for the crystals to melt all the way.
Once all the crystals have melted and the isomalt appears to be bubbling throughout / boiling, carefully remove the pot from the heat. I simply moved it to another burner for a minute or two.
You’ll want to watch the bubbly mixture as it slowly calms down off the heat. When all the bubbles disappear, you can bring the pot back over to the initial burner and begin the heating process again.
Once the pot’s back on the heat, you can add the water a little at a time and quickly stir after each addition—1/4 of a tablespoon at a time. It’ll react a little to the water being added and get sort of steamy / continue to bubble—that’s normal.
Place the pot into the now-heated oven for 10 minutes. This allows the bubbles to get out of the final mixture—otherwise you’ll end up with a bubbly, un-clear final look.
Pour the isomalt into the cookies!
Using a large spoon and working fairly quickly, but not so quickly that you pour isomalt all over the place, pour the isomalt into the holes of each of the waiting cookies. Better to start with too little of the mixture and work your way up than to accidentally pour isomalt all over the entire batch. You can use the tip of the spoon to gently coax the isomalt into the corners of the cookie, if it’s not making its way there on its own.
If the isomalt begins to harden up again, you can always place the pot back in the oven for a few minutes to liquify it once more.
After the pouring process is done, leave the cookies in place for at least 30 minutes without touching them so that the isomalt can fully harden. Then, carefully peel them off of the parchment paper and observe the beautiful final look. You did it!!!!!!!
Almost.
De-fog the windows.
Use a small amount of canola oil on a piece of paper towel or cloth to gently wipe the surface of both sides of the candy glass on all of the isomalt-filled cookies; you’ll notice that the “view” clears up almost immediately.
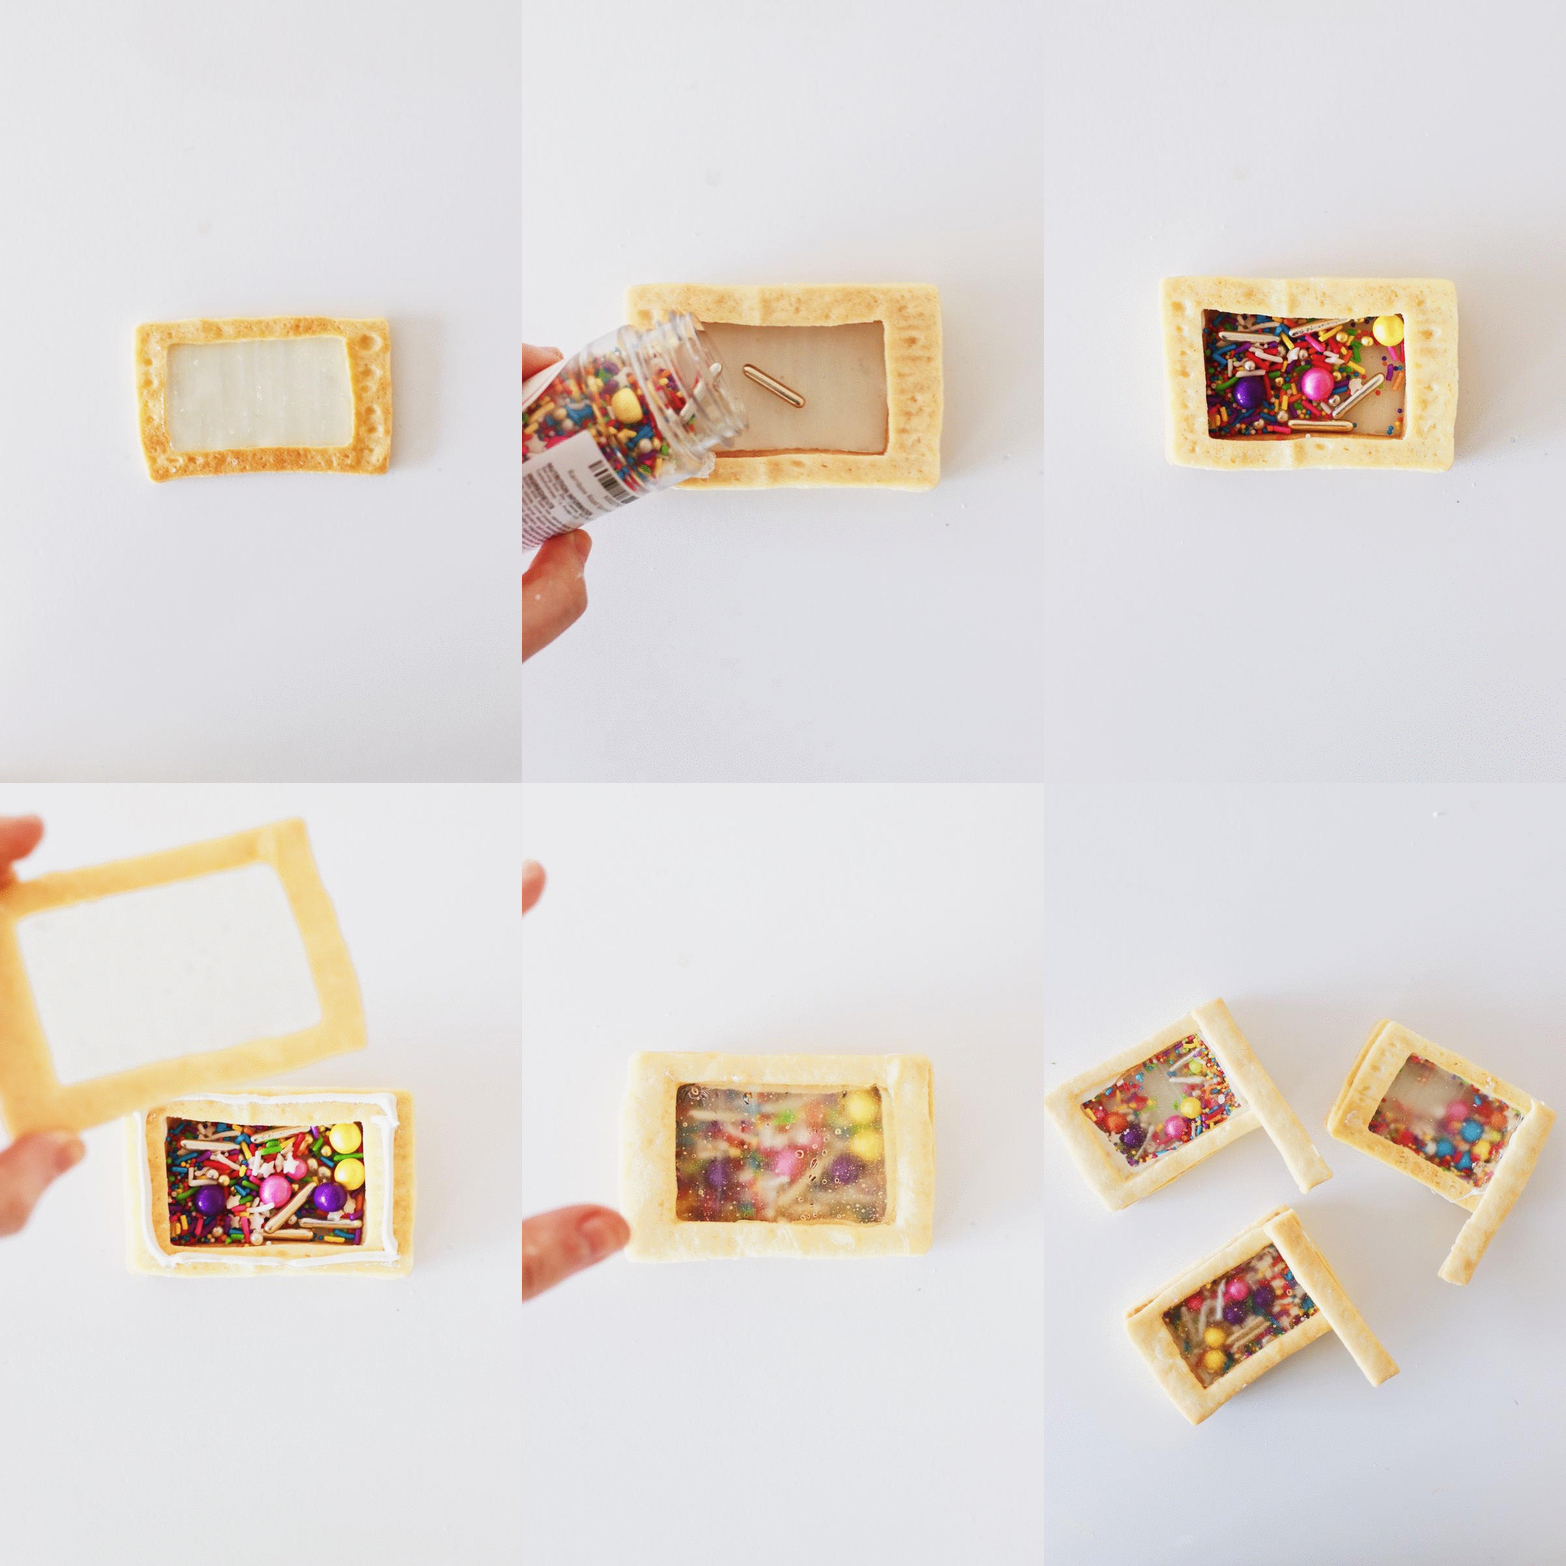
Assemble the lulav cookies.
(Above, I’ve included the fancy-shmancy gif from my similar-looking edible grogger cookies so that you can see what the general process looks like!)
Place one of the isomalt-filled cookies onto a flat surface. Pipe or apply a careful, clean line of royal icing to the perimeter of the cookie. Make sure not to get any icing onto the window itself—otherwise your sprinkles will stick.
Add one of the hollow cookies on top of it, pressing gently to stack. Wait for it to dry FULLY before adding sprinkles; otherwise, the sprinkles might get stuck to the icing.
Fill with sprinkles! Not too full so that they don’t have room to shake around, but not too empty so that they don’t have other sprinkles to “hit” and make noise against as they travel around.
Pipe a line of royal icing to the perimeter of the top of the hollow cookie. Stack your last filled cookie on top and press gently. Wait for the entire thing to dry—overnight is a good idea!
Shake, share, gift, eat!
